Squish GUI Tester 7.0 is the first Squish edition to offer a unique new feature: video capture of test executions to debug and document tests.
For a long time, it has been possible to capture screenshots of the desktop where AUT was running with Squish, whether automatically in case of a test failure or on-demand using API functions in scripting languages. While this helped users get an overview of the situation in AUT and on the desktop at the point of failure, it provided a rather static picture of the events.
The ability to capture the test execution on a video provides a more dynamic overview, especially close to the point of a test failure, and has been long sought-after by customers. In Squish GUI Tester 7.0, we finally made it happen:
The Squish IDE, as well as the Squish command-line interface, gained the option to document tests in parts or their entirety in a MPEG-4 video. The video is included with the test results and can be replayed in a newly-added integrated video player in the Squish IDE and Test Centre.
Capturing videos with Squish GUI Tester
Step 1: Starting and stopping video capture in a test script
As the first step towards obtaining a video capture of the desktop on which AUT is running, we need to tweak the test script and mark where the video capture should start and stop.
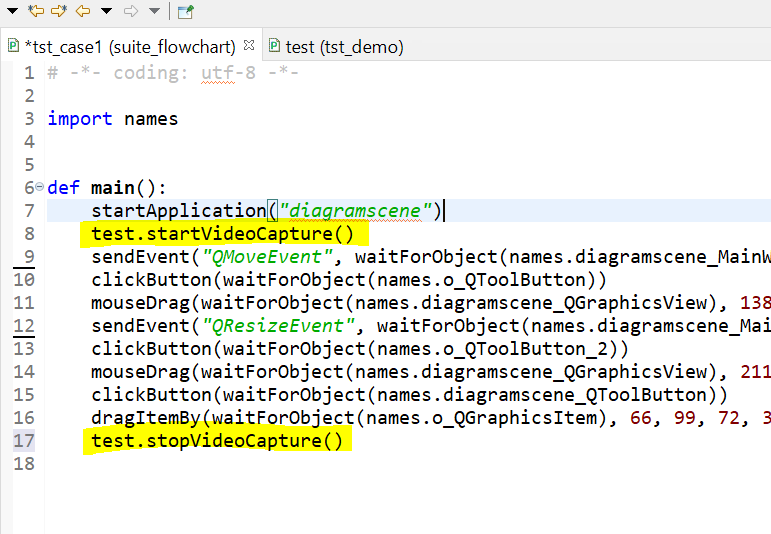
For this purpose, we have added 2 new function to Squish test API: 'test.startVideoCapture' and 'test.stopVideoCapture'.
You can insert these functions into the test script multiple times and, if possible, pair-wise (for every 'test.startVideoCapture' there should be a corresponding 'test.stopVideoCapture') with the exception of the final 'test.stopVideoCapture'.
This one is optional, and if not present, video capture will automatically end with the end of test execution.
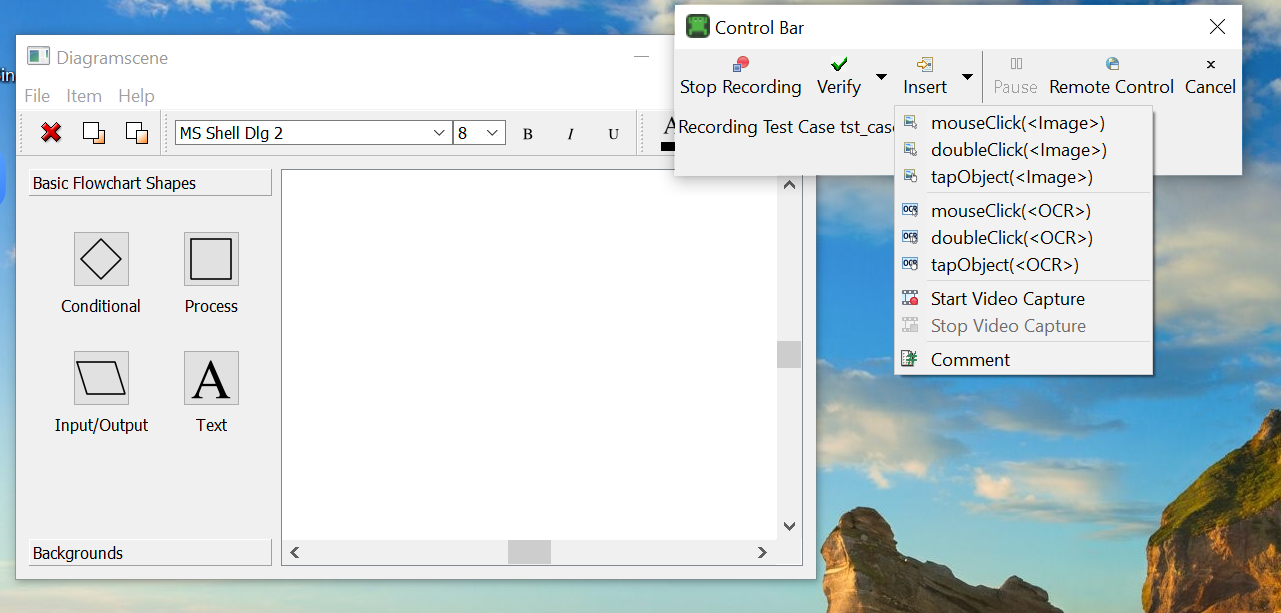
You can use these API functions in any scripting language supported by Squish when writing test scripts manually. However, doing so from the IDE control bar when recording can provide a more streamlined user experience.
There are two new options in the control bar's *Insert* menu to insert a start and endpoint of a video capture. With these, it is easier to ensure pair-wise insertion as you have to start the video capture before you can stop it.
Whether video capture is active at any given time is also indicated in the title of the control bar.
Step 2: Replaying a test with active video capture
Once we've inserted the points indicating the start and stop of a test execution's video capture, we can use the green *Replay* button in the Squish IDE as usual.
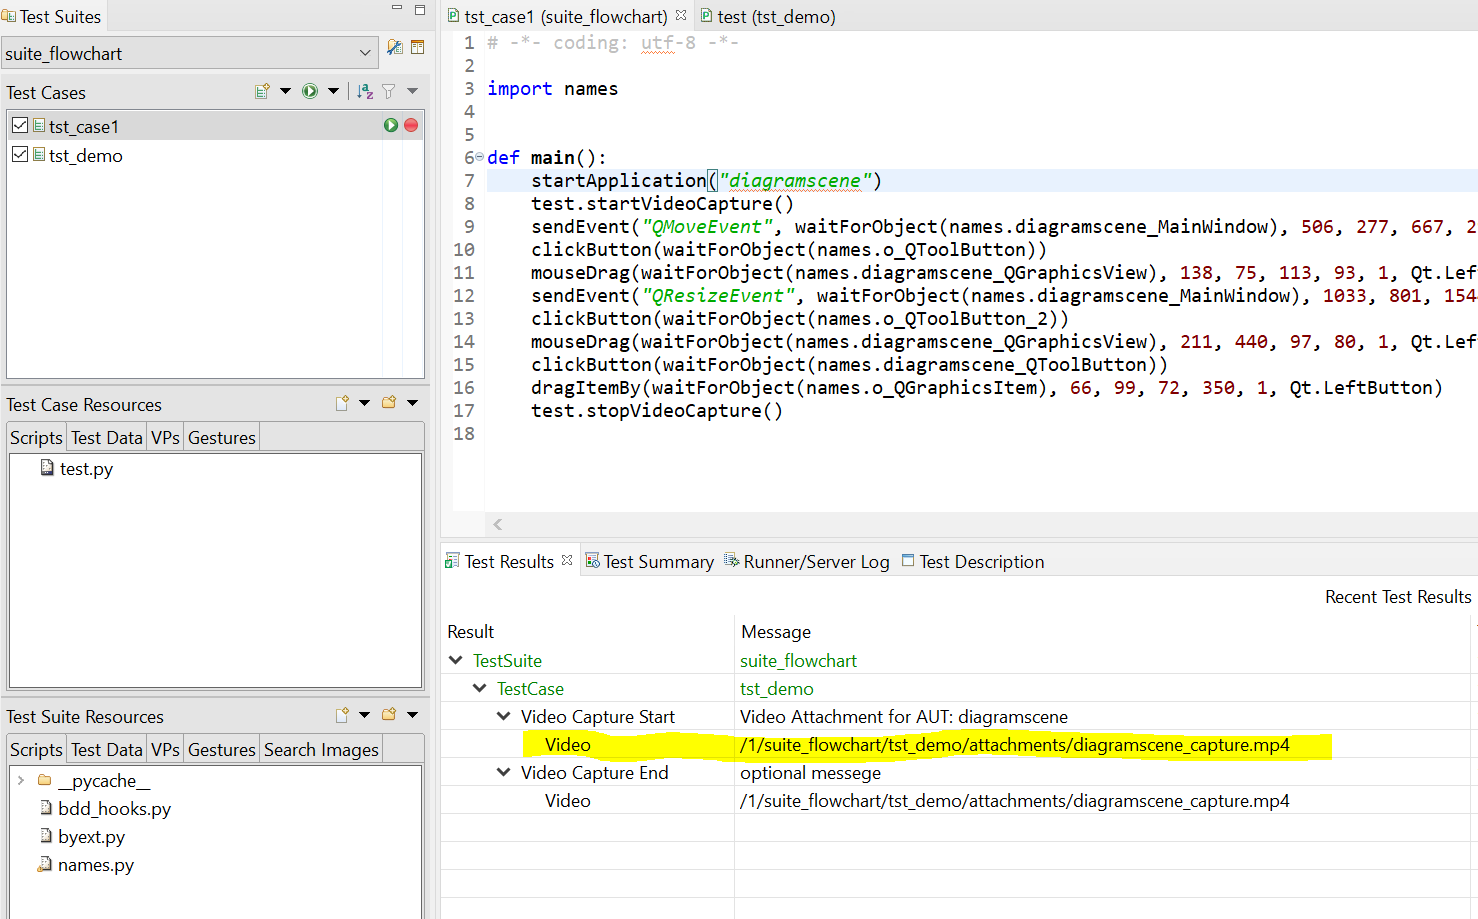
Now, in addition to replaying recorded user interactions, Squish will capture everything happening in AUT and on the desktop in a MPEG-4 video file. For every segment of the test enclosed in the pair of 'test.start-' and 'stopVideoCapture' commands, there will be one video attachment included with the test results.
For the users of squishrunner command-line interface and/or those who use squishrunner in connection with various CI systems, there is an alternative way to replay a test with video capture: '--enable-video-capture
When used in combination with '--testcase', the execution of the given test case will be from the beginning till the end. With '--testsuite' option, the same applies for every testcase in the given test suite.
Finally, a word of caution: Since Squish always captures the entire desktop on which AUT runs, to avoid breaches of privacy, we advise closing all documents, deactivating chat notifications, and terminating any application other than AUT that may be running in the background before launching a test with active video capture.
Step 3: Viewing video attachments of test results
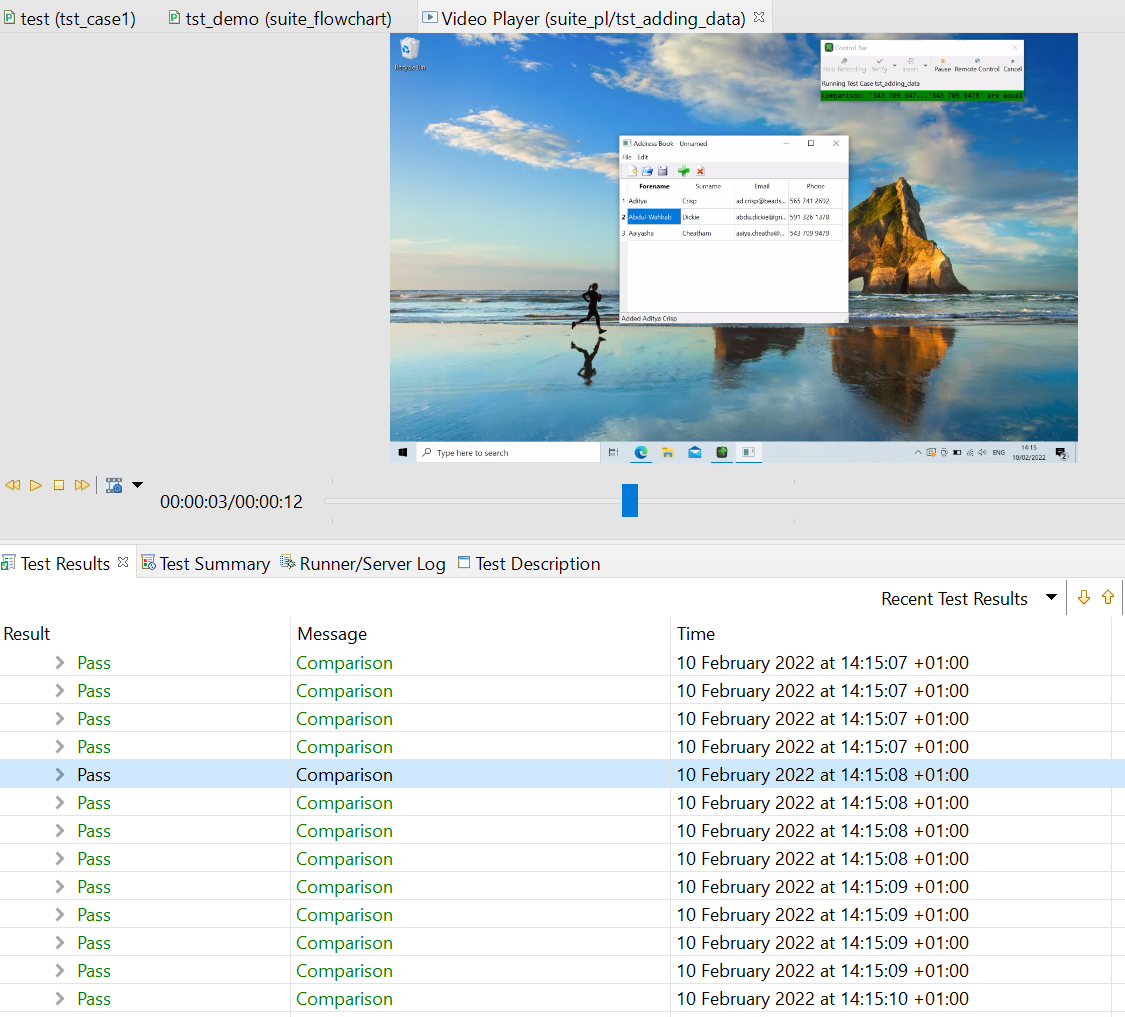
Once we have replayed the tests with active video capture and obtained test results with one or more video attachments, we can view these videos in the Squish IDE via the new JavaFX-based video player. Double-click on any video attachments in the IDE test results view to open the video player. A new IDE view (tab) opens, and video playback starts. The video player has all the basic buttons to control the video playback (start, stop, pause, fast forward, rewind) a slider to move to any position in the video, and a simple settings button to adjust the speed of video playback.
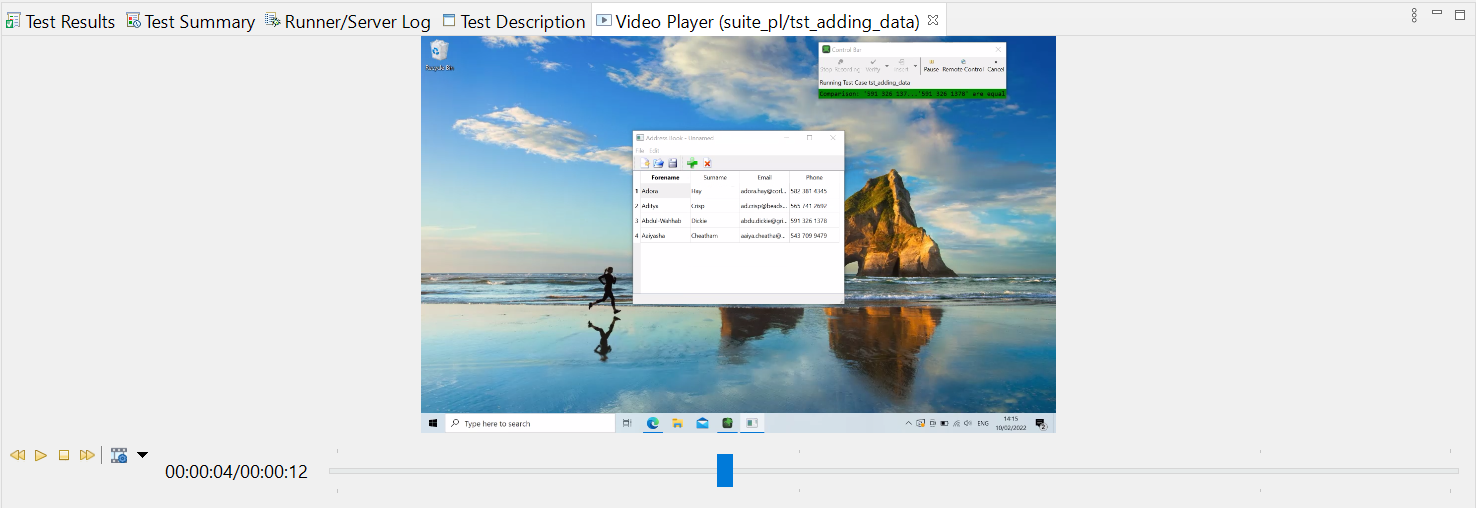
To jump immediately to a specific point in the video capture (e.g., to a point where the test failure occurred), we've added GUI controls helping users to do just that. Right-click on the selected point in time in the test result view and select 'Jump to Video at Timestamp' in the context menu or equivalent button in the view's toolbar. The video player will open in a paused state at precisely that moment in time so the user can easily get an overview of what was happening shortly before and after.
Video playback and test results can also be viewed side-by-side and are linked by default. The slider's position in the video player moves as the user moves up and down the result tree, highlighting the entries. Similarly, as the video playback progresses, the highlight position in the test result view follows it.
If you do not use the Squish IDE, you can view captured videos of executed tests in Test Centre.
Platform availability
The video capture feature is available in all Squish GUI Tester editions on desktop (Linux, Windows, macOS), mobile platforms (Android, iOS), and Squish for Web. This is possible thanks to cross-platform ffmpeg libraries shipped with all Squish binary packages. Squish users building from source code can read on how to enable ffmpeg support and make use of video capture feature on their platform here.
In conclusion, we hope you enjoy this feature and find capturing videos of your GUI tests helpful. Let us know what you think in the comments below!