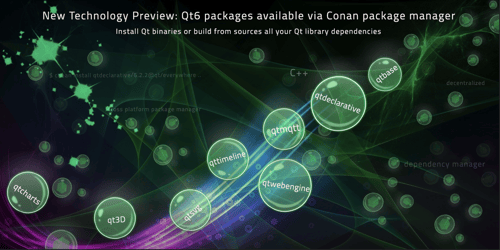
Qt 6.3.1 Conan packages released
June 28, 2022 by Iikka Eklund | Comments
We are happy to announce the Qt 6.3.1 Conan Technology Preview packages release today. The packages are available with the Conan package manager from The Qt Company Conan server. Both desktop (Windows MSVC2019 and MinGW, macOS, and Linux) and mobile (Android) packages are available.
Conan is the open-source, decentralized, and multi-platform package manager to create and share native binaries for C/C++. There are already almost 1,000 developers, who have downloaded and used Qt packages via the Qt Conan server.
Why should I use Conan package management?
- Easier to manage any transient dependency - define the dependency and Conan manages the dependencies with exactly the correct package versions.
- Improved modularity - Download only the packages your project needs, nothing else.
- Manage external libraries - Conan helps in using dependencies to any other libraries as long as you have the Conan recipe
- Custom build configurations - Didn't you find the binaries/build configuration you needed? Just edit the provided build profiles for your needs and pass "--build" and Conan will build everything you need from sources (provided you have compilation tools in your environment). The built binaries are stored in your local Conan cache, from where the binaries can be then easily re-used.
- Conan caches the binaries locally so additional installations are faster.
How to get started?
Install Conan from here. Using a recent version is preferred (1.47 or later).
To get access to our Conan packages, go to the "Conan Package Manager" page in Qt Account to generate your personal credentials for the Conan server.
1. Add the remote to your local configuration:
$ conan remote add qt https://qtpkgtest.jfrog.io/artifactory/api/conan/qt
2. Authenticate to our server:
$ conan user -p PASSWORD -r qt USERNAME
Building an example for desktop
1. First, declare the dependencies your application has:
$ cd <my app folder>
my_app_deps.txt:
[requires]
qtbase/6.3.1@qt/everywhere
qtdeclarative/6.3.1@qt/everywhere
2. To access the pre-built Qt binaries install the build profiles used by Qt CI:
$ mkdir build && cd build
$ conan install qtbuildprofiles/6.3.1@qt/everywhere --remote=qt$ conan install my_app_deps.txt --profile=linux-x86_64-gcc --update --generator=virtualenv --remote=qt
# wait for the installation to complete ...$ source activate.sh # on windows run the activate.bat# build your app$ cd <my app dir>$ qt-cmake CMakeLists.txt$ cmake --build .
# run your app
Building an application for Android
1. First, you need to install the host binaries where you are running the builds:
$ mkdir host  && cd host
$ conan install qtsvg/6.3.1@qt/everywhere --profile ../linux-x86_64-gcc --generator=virtualenv --update -r qt
$ cd ..
2. Then install the Android binaries:
$ mkdir target  && cd target
# Note1: pass the QT_HOST_PATH to build system via Conan using -o qtbase:qt_host_path=<host install folder in step 1. above>
# Note2: pass the Android Sdk and Ndk versions as well
$ conan install qtsvg/6.3.1@qt/everywhere --profile ../unix-android-x86_64-clang --update --build=never -r qt --generator=virtualenv -o qtbase:qt_host_path=/<my work folder>/host/ -o *:android_sdk_version=31 -o *:android_ndk_version=r22b
3. Activate the virtual environments:
$ cd ../host && source activate.sh
# Then activate the target (Android) virtual env:
$ cd ../target && source activate.sh
4. Build your application:
$ cd <my app folder>
$ qt-cmake CMakeLists.txt
$ make

Conan usage example
Please look at more details here.
Your feedback is still valuable!
We are interested to hear how Qt Conan packages would fit in your workflow? I.e. using Qt "the package manager way". Any of the following feedback channels can be used:
- Please let us know your thoughts in this blog post comments.
- Please use Qt Bug Tracker to file bugs and suggestions. Please use the component Conan to allow easy filtering.
Blog Topics:
Comments
Subscribe to our newsletter
Subscribe Newsletter
Try Qt 6.10 Now!
Download the latest release here: www.qt.io/download.
Qt 6.10 is now available, with new features and improvements for application developers and device creators.
We're Hiring
Check out all our open positions here and follow us on Instagram to see what it's like to be #QtPeople.


