Qt 6.4 includes the new module Qt Quick 3D Physics as tech preview. As the name implies, this is a module that adds physical simulation capabilities on top of Qt Quick 3D. In particular, it enables rigid body simulation using simple primitives (spheres, boxes, planes and capsules) as well as convex- and triangle meshes and heightmaps. Physical properties such as mass, density, gravity and friction are customizable. This makes it possible to create physically correct behavior in 3D scenes without having to handcraft animations.
Adding physics to your scene is quite easy. The following snippet is all it takes to create and render a whole scene with a plane and a box interacting with each other:
import QtQuick
import QtQuick3D
import QtQuick3D.Physics

Window {
    visible: true
    DynamicsWorld {}

    View3D {
        anchors.fill: parent

        PerspectiveCamera {
            position: Qt.vector3d(0, 100, 500)
            clipFar: 5000
            clipNear: 1
        }

        DirectionalLight {
            eulerRotation.x: -45
            eulerRotation.y: 45
            castsShadow: true
        }

        StaticRigidBody {
            position: Qt.vector3d(0, 0, 0)
            eulerRotation: Qt.vector3d(-90, 0, 0)
            collisionShapes: PlaneShape {}
            Model {
                source: "#Rectangle"
                scale: Qt.vector3d(10, 10, 10)
                materials: PrincipledMaterial {
                    baseColor: "green"
                }
                castsShadows: false
                receivesShadows: true
            }
        }

        DynamicRigidBody {
            position: Qt.vector3d(0, 200, 0)
            collisionShapes: BoxShape {}
            Model {
                source: "#Cube"
                materials: PrincipledMaterial {
                    baseColor: "yellow"
                }
            }
        }
    }
}
And this is how it looks: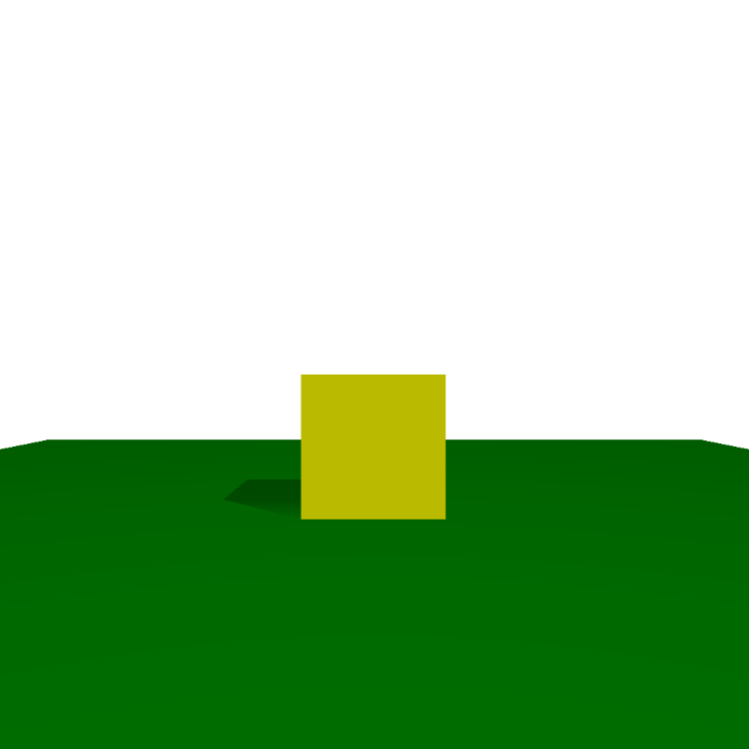
Qt Quick 3D Physics is a pure QML API and is currently available as a tech preview in Qt 6.4. The documentation comes with a handful of explanatory examples showing off the different capabilities of the module. This is the best place to start if you want to try it out yourself. There is a lot more that could be said about this module but since a picture says a thousand words I imagine this video of the examples will say even more.
I hope you found this blog post interesting and I look forward to seeing what you will create with this new module.