Apr 21, 2023
With the Qt 6.5 LTS out in the wild, it is a good time to write more about the Qt 6 and effects. Laszlo already wrote a blog post about post-processing effects in Qt 6.5, focusing mostly on Qt Quick 3D, ExtendedSceneEnvironment and the general Qt effects story. This blog post gives a bit more details about the latest Qt Quick (2D) effects offerings.
With Qt 6.5 the Qt Quick effects story is now pretty solid. Qt 5 was a great platform for effects and Qt 6 is even better. Here's a cheat sheet image you can print and hang on the wall:
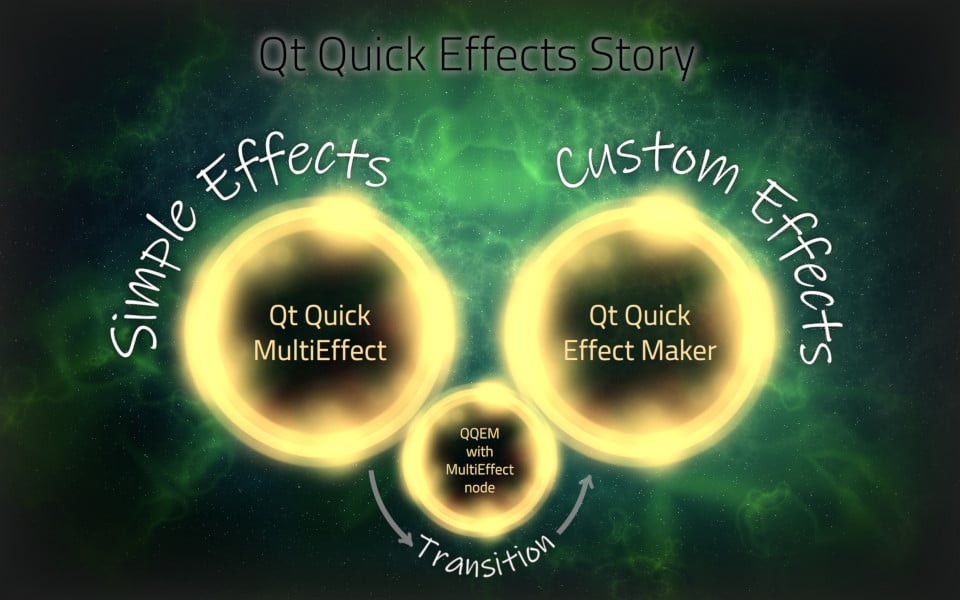
Simple Effects: Qt Quick MultiEffect
Let's start with the bread and butter, the simple effects. This is when you want to add a drop shadow to a UI element, blur the background of a panel, mask elements with a threshold or maybe just slightly adjust the brightness. In these common effect cases, your new friend is the Qt Quick MultiEffect element. MultiEffect supports 7 effects (blur, shadow, mask, colorization, brightness, contrast and saturation) and of course combinations of these all. Depending on which effects are enabled, the most optimal shader gets used. And as it uses Qt 6 RHI, the shaders naturally contain OpenGL, Vulkan, Metal and Direct3D versions compactly packed into the qsb file.
Here is a simple code example of a component using Qt Quick MultiEffect:

So, we first import the QtQuick.Effects module which contains MultiEffect. Then create a 'HELLO' text element and apply MultiEffect with shadow and some colorization for it. Output can be seen on the right side: The white text becomes red with a blurred drop shadow. Easy and powerful!
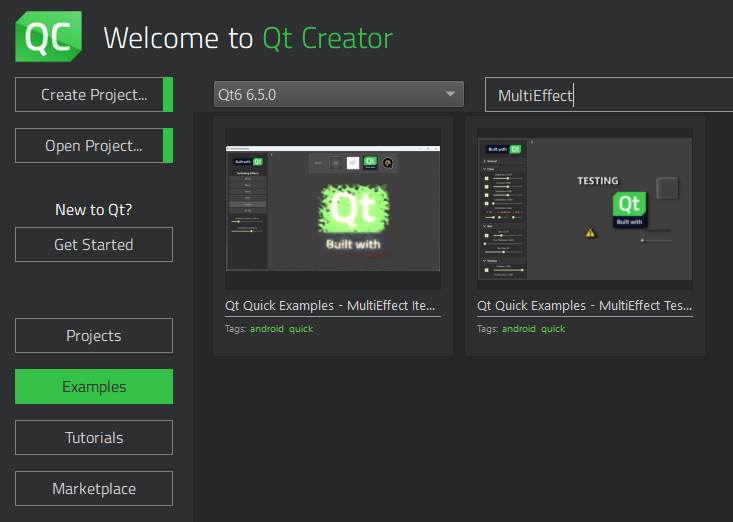
Qt 6.5 includes two MultiEffect examples. So if you want to see more, just type 'MultiEffect' into the Qt Creator examples view:
Custom Effects: Qt Quick Effect Maker
Sometimes reaching the designer's visions will require a more dedicated approach. Creating a custom effect beforehand is usually a more performant option than combining shaders/images/layers at the runtime. The Qt tool created specifically for this task is called the Qt Quick Effect Maker. You can read more about the QQEM features from the introduction blog post or the example usage post.
QQEM has already been used in many projects and more will join now when it is easily accessible as part of the Qt 6.5 installation. Here's a short video showing it in action:
If you are interested in testing the QQEM for your projects, just follow these installation instructions. You can also open the new Wiggly example which contains an effect made with QQEM. If you want to modify the effect, open the WigglyEffect.qep project file with QQEM and go wild.
Transition: The MultiEffect node
Now someone may say "I would use MultiEffect, but...", explaining how it applies some effect differently than they would prefer or is missing just the one important effect. Or maybe the development started with MultiEffect and it is later realized that some tweaking is required. We have considered also this, making the transition easier.
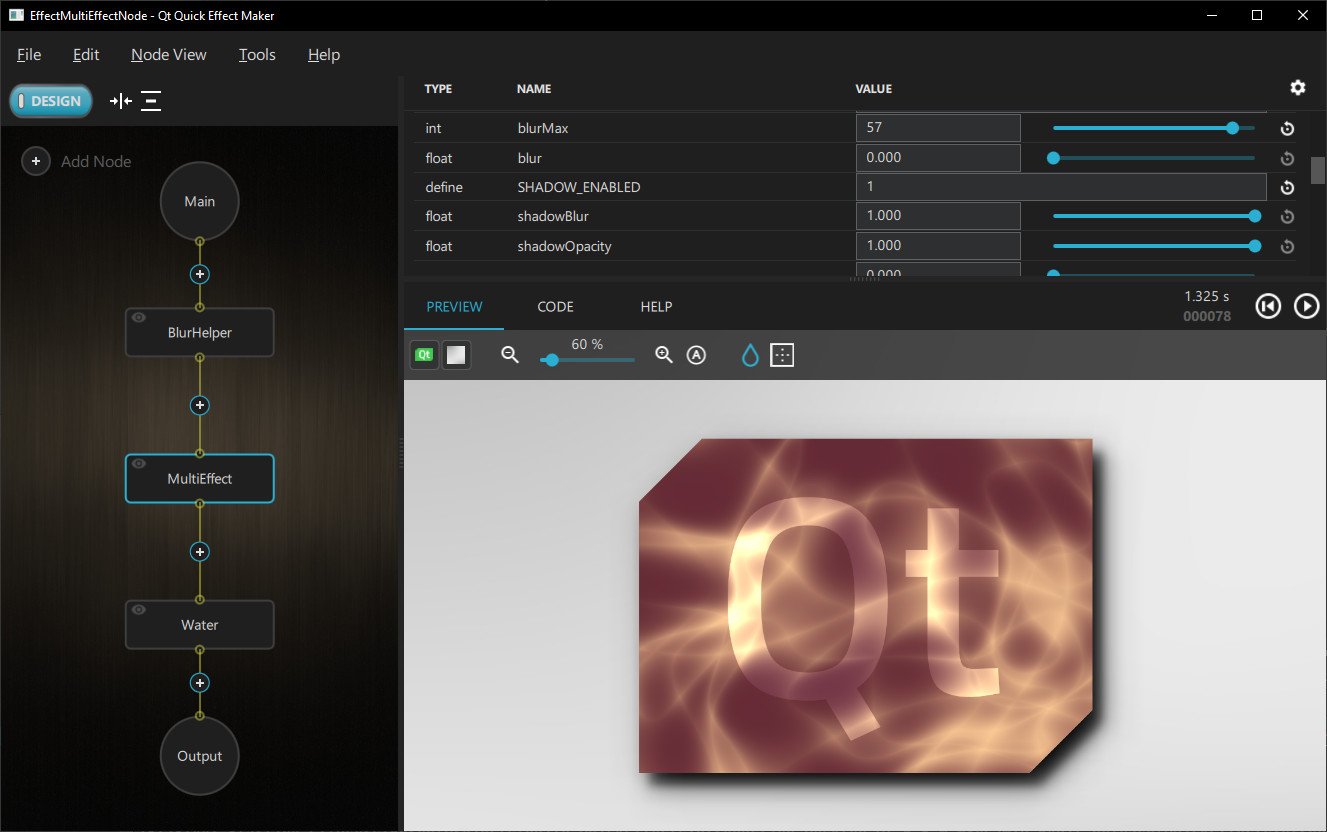
In this case, you can use the MultiEffect node available in the Qt Quick Effect Maker. This node has the same effects API as the Qt Quick MultiEffect and the rendering output is also the same (because of the matching shader code). If you don't believe me, watch what happens when I switch the testbed example to use custom MultiEffect instead of the standard MultiEffect:
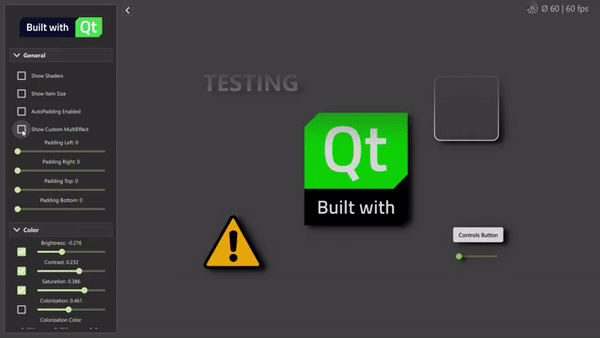
The effect output remains the same, just showing that warning about paddings which MultiEffect can do automatically. Also note that with the MultiEffect node, you should select which effects are enabled in QQEM properties view before exporting the effect to get the most optimal shader. Qt Quick MultiEffect contains multiple shaders so it can select the optimal one at runtime.
With the MultiEffect node, it is possible to freely modify the shader to your liking. Also, it is possible to extend it with any other nodes. You can initially use the simple Qt Quick MultiEffect and then smoothly switch to the custom effect.
Other options
The above approaches are the recommended first options to add effects to your Qt Quick UIs. Obviously, there are also other options.
Qt Graphical Effects are still available in the Qt 5 compatibility module. We don't recommend using them with new code, but if your application uses these and they work for you, feel free to continue the usage also with Qt 6.
Likewise, if you want to use the ShaderEffect element directly, that is also still a valid option. The effects exported from QQEM also use it, so the difference is just that with QQEM you usually have better productivity due to automatic baking, live preview, integrated properties, shader inspection etc. But if you already have a perfect shader effect, just pass that as qsb to ShaderEffect.
Summary
Qt 6 has always had a very powerful architecture for shader effects with the Qt Rendering Hardware Interface (RHI) and the Qt Shader Tools. With Qt 6.5, we now offer APIs and tools to make it even easier to use this power. The common Qt Quick effects story (since Qt 6.5) can be simplified to:
For simple effects, use the Qt Quick MultiEffect. For custom effects, use the Qt Quick Effect Maker.


