With the 1.5 release Qt Design Studio you can now try the flow mode feature. In this first part of a multi part blog post I want to cover the basic usage of the flow mode and how to get started, at the end we will look at the planned advanced features coming up in the next version of Qt Design Studio.
What is Flow Mode?
A flow can be described as a schematic view of the screens in your application, somewhat similar to a node graph used for visual programming although specifically implemented for the task of creating UI flows. The flow graph itself shows each screen and how it is connected to other screens and the possible user pathways through the application. Traditionally designers would create these flow boards as a mock up design for presenting the concepts for the flow of an application. With the advent of tools such as Sketch it became possible to run the designer created flow diagrams as a type of interactive prototype that can be clicked through to simulate the user experience of the application. However, the actual logic for this flow would still have to be re-implemented from scratch by developers.
Flows in Design Studio provide a more complete end to end solution to the problem. They allow the designer to rapidly prototype a full application by modelling the flow in the familiar nodegraph-esque visual programming style. The QML code is created in the background, which allows the designer to extend the functionality of their flow beyond the limits inherent in more traditional design tools. The end results are both a high fidelity prototype and functional code developers can use as the base of the production version of the application.
Creating a flow in Qt Design Studio - The Basics.
Setting up your first Flow
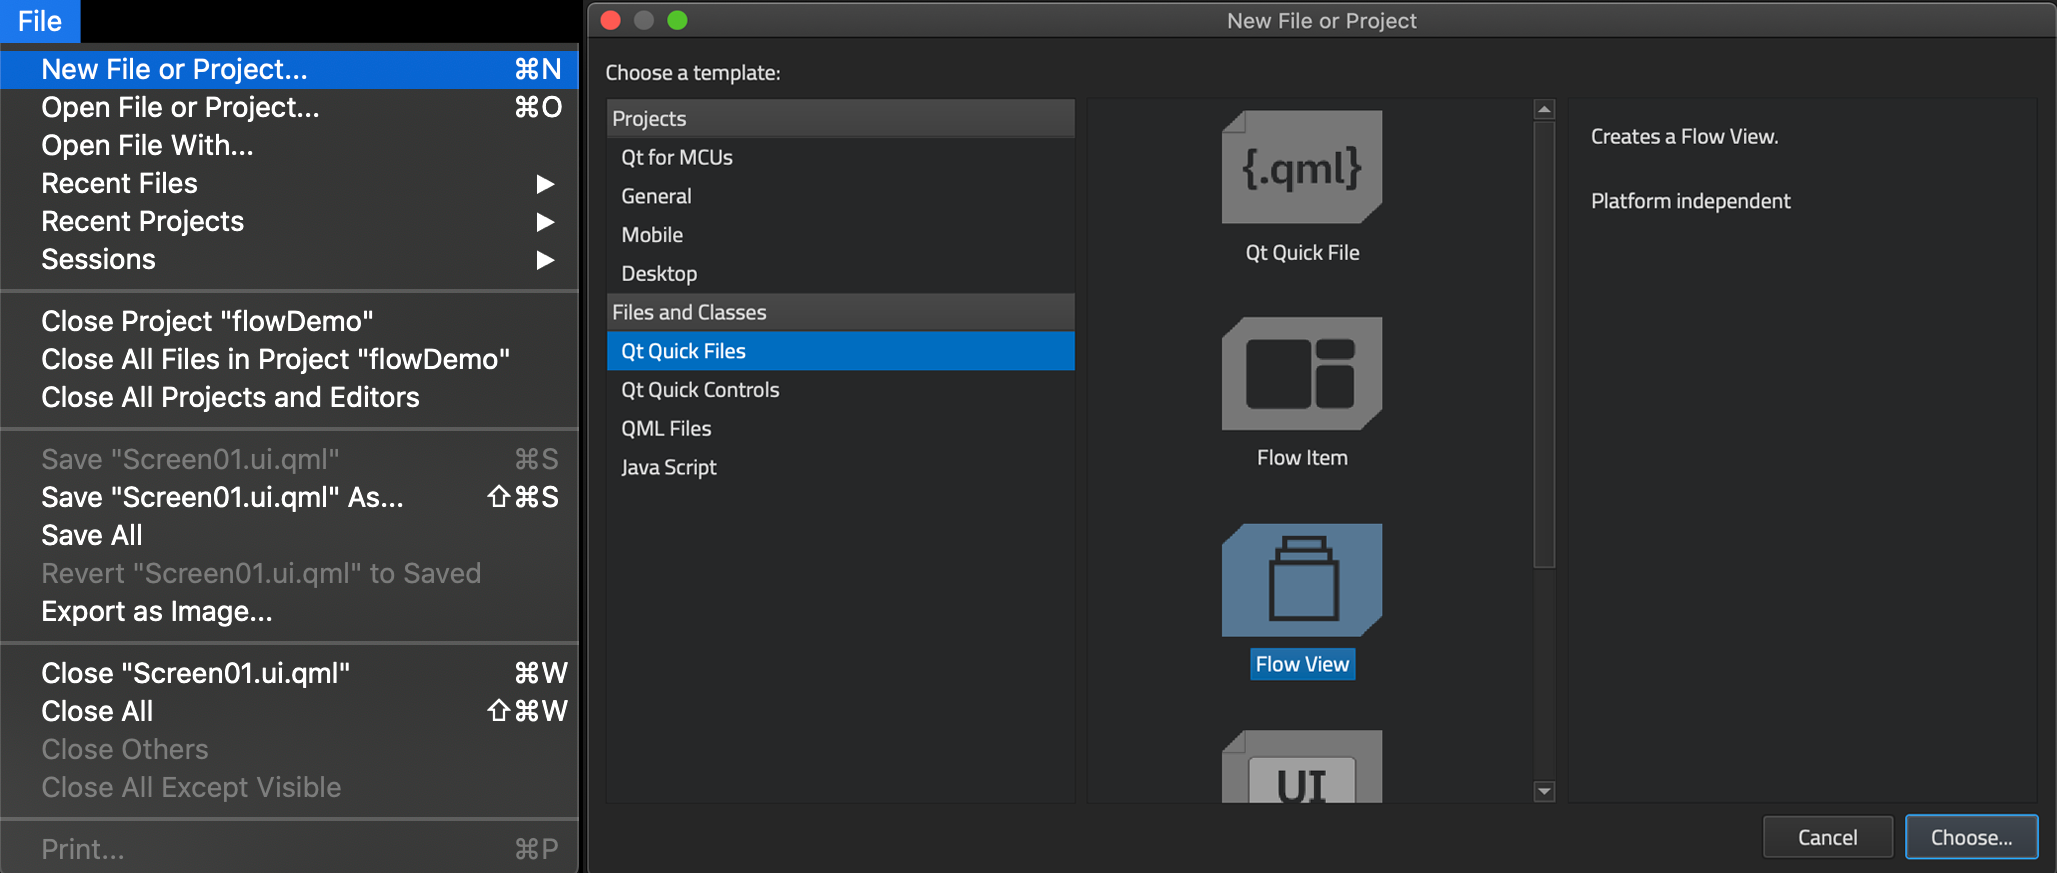
You can create a flow in either an existing project or a new project, to start using flow mode you need to be in a project and then add the following items via the file menu / New File or Project Wizard.
Create Flow View
The first file you need is a new QML Type called Flow View, this is the canvas you will connect all the screens of your UI together in. This file can be added via the wizards after you have created a project and then go to add new file, the new QML Types used in flows can be found in the Qt Quick Files section.
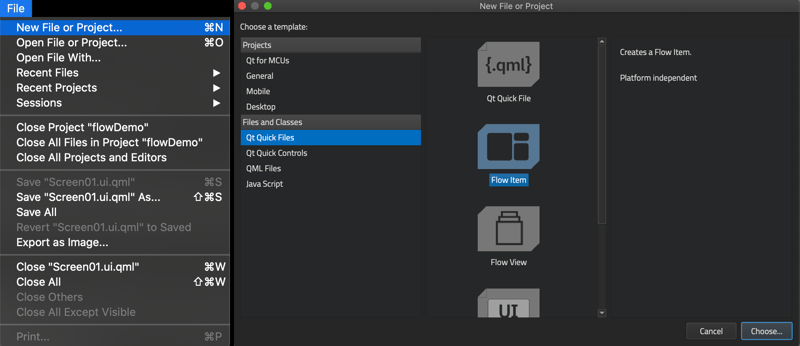
Create Flow Items
Next you need a new type of screen that can be used by the flow mode, a Flow Item. You can also create these via the wizards, these files are a type of UI.QML file that can be inserted into your Flow View file.
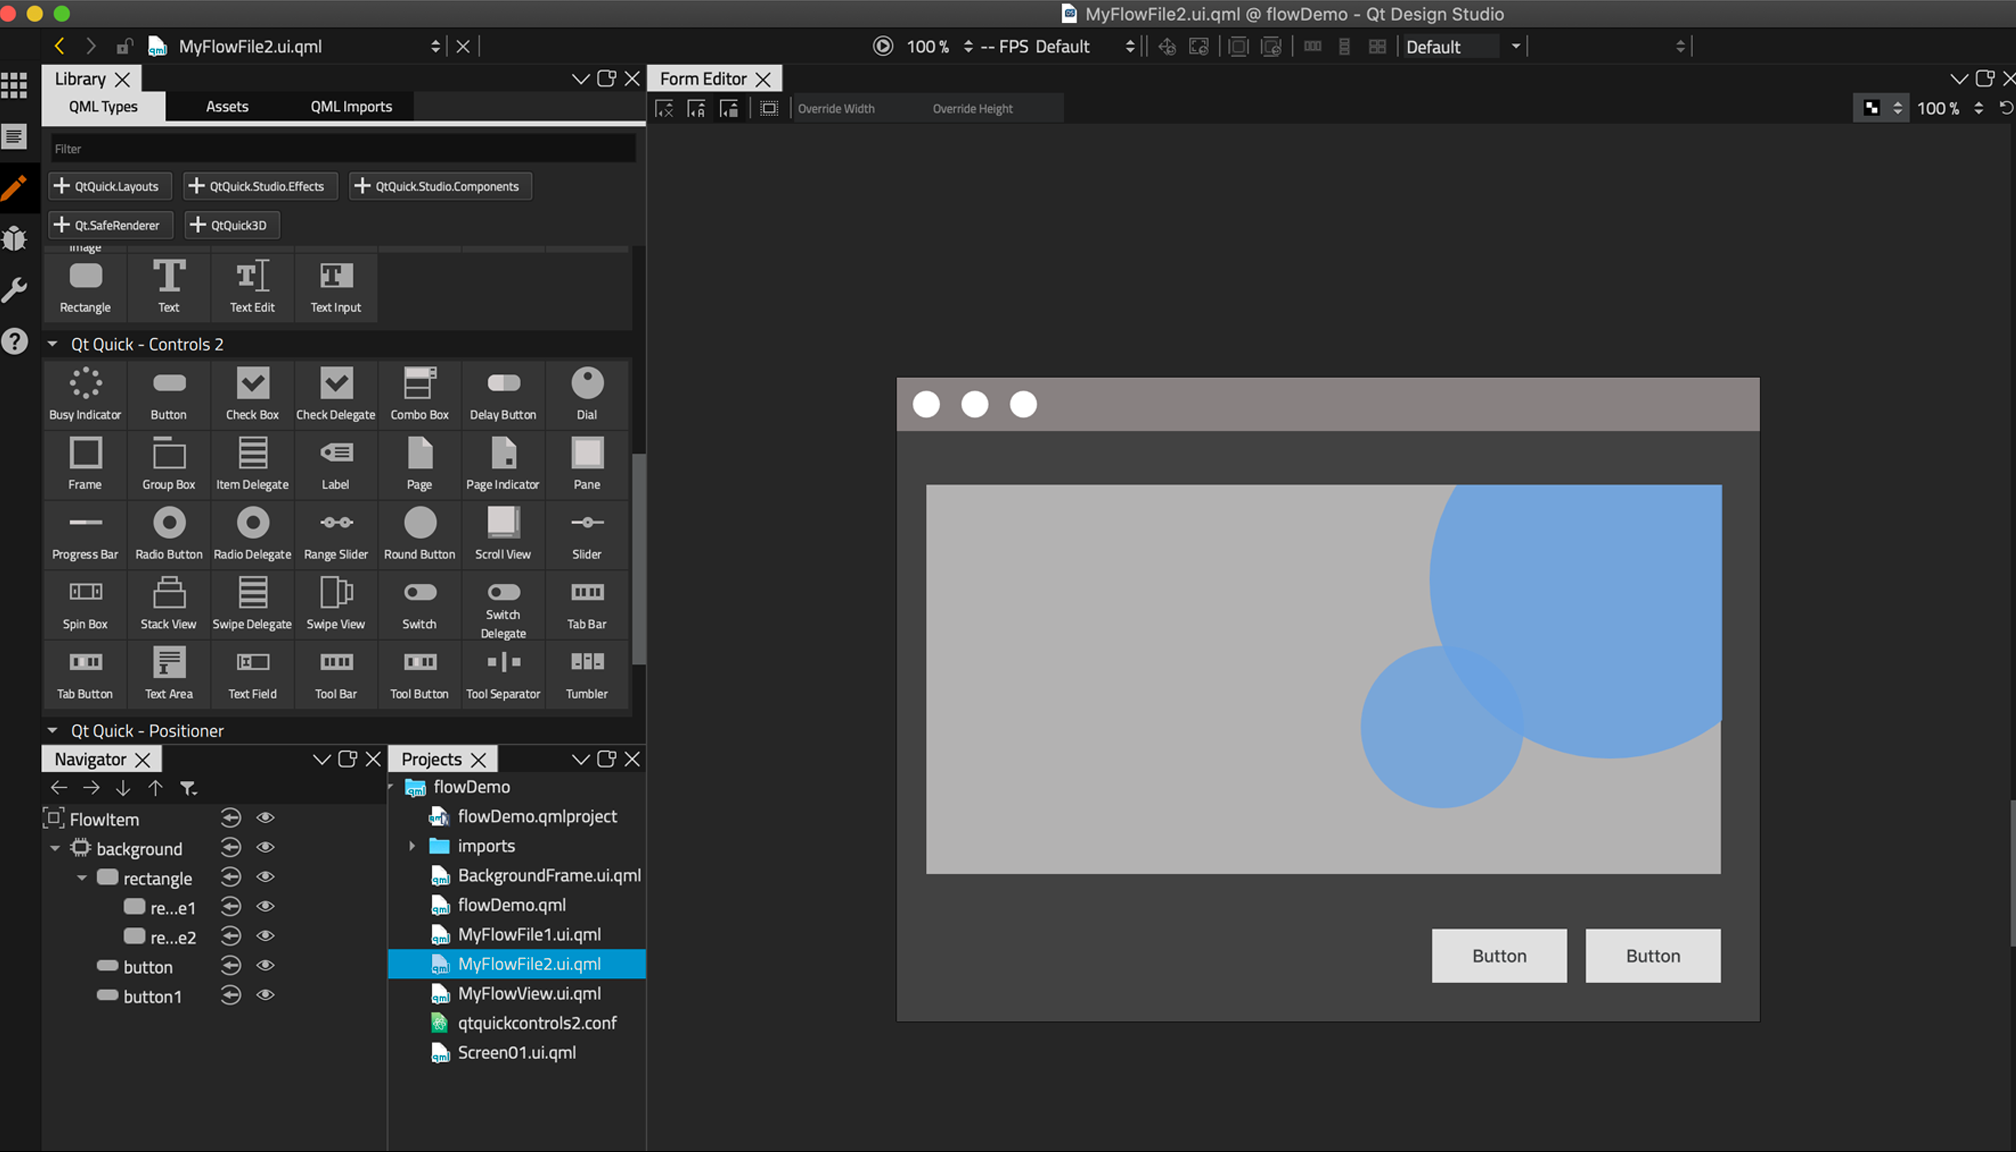
Creating Screen content
Adding content to Flow Items works the same as designing any normal screen in Qt Design Studio, as these Flow Item files are simply a type of UI.QML file, meaning you can use them in exactly the same way as a normal UI file. They can contain sub-components, quick controls, animations and everything else you can add to a normal UI file. The only real difference is that these files can be seen by the Flow View so when you are looking at the QML library these special components are the only items visible in the My QML Components panel.
Adding your files to the flow view
Drag the Flow Item from the library to the Flow View and then you have the first screen in the flow, of course you need at least two screens to make a flow work so after you have the second screen in place you can start using the Flow View properly.
Adding action areas
Action areas can work in a couple of ways, first is to act as a simple clickable area which initiates the transition, this is the simplest way to use the flow editor for prototyping so it’s what we will concentrate on here. The other use for action areas is that you can connect any signal from any component in your flow screen or any sub-component thereof, for example a button in your screen that has an onPressed signal. In this first part of the blog we will look at the simple use case and then in the second part we'll look at the more advanced use case.
Connecting Screens
Once you have an Action Area you can use it to connect to another screen, either by double clicking on the action area and then dragging the connection line to another screen and releasing it, or, by using the context menu for the Flow View, where all the relevant controls can be found. After you have connected the screens together you have your first flow, you can now run the Live Preview and click on the button covered by the Action Area, which will not be visible in the Live Preview, to see a usable preview of the first transition.
Adding Effects
Once you have a transition in place you can add an effect to it. You do this by selecting the transition directly, going back into the context menu and selecting an effect for this transition. Once the effect is applied you can edit the effect via the property panel, for many effects there is a transition direction which defines the direction the new screen will appear from. You can set the duration of the effect and you can launch the curve designer to apply a custom easing curve to this effect.
Editing Effects
To go back and edit a previously applied effect you can select the transition, go to the context menu and select the effect, this brings the effect controls back into the property panel.
Go Back
One of the special features of Qt Design Studio’s flow mode is the addition of a back button, in a large number of cases there will be a many to many relationship to your screens in the flow, traditionally you would have to create explicit connection lines to and from every potential connected screen, resulting in a confusing and messy diagram. With Qt Design Studio you can simply set an action as “Go Back” and it will always return you to the previous screen.
Previewing in Live Preview
As with all screens in Qt Design Studio you can preview your changes in real time with the Live Preview, just run the preview and continue working on your flow, your changes will be updated in real time and you can test them directly in the Live Preview window.
Appearance
The Flow View properties allow you to adjust the appearance of all the items in the flow, the connection lines, Action Areas and advanced nodes such as Decisions and Wildcards. You can change the global settings for all items or you can select an individual line, node or action area and change the appearance of just that item, including the color, line thickness, dotted or solid lines and even the curve of the connections, allowing you to add extra semantics to the design of the flow diagram itself.

Decisions
Part of any complex UI is the conditional logic it uses to present its state to users or collect and process various sources of data, user interaction from a variety of inputs such as physical buttons and controls, sensor readings from arrays of equipment or general values from the backed / service APIs. With Decision Nodes you can simulate any of these conditions by presenting the user with a list of options, letting you prototype complex interactions before you have any of the production required physical controls, backend or sensor data. In the future you will be able to tie in these decisions to actual backed values or event lists, transferring your prototyping efforts into the early states of actual production code.
Coming up in Part 2
In the next part of the blog series we will look at how to use the advanced features planned for the next iteration of the flow editor.
Wildcards
Another common functionality of real world UI’s that we noticed was not well handled in the traditional flow design tools was the screens that can come from anywhere or at any time, based on a conditional event. Take for example push notifications on smartphones or incoming call screens on your car’s HMI. With Wildcards you can model this type of screens in your flow, using real or simulated signals and conditions, allowing you to take your flow concepts beyond that traditional barrier. Another use case we planned for here was the inclusion of white and black listing for these wildcard events. To continue from one of our examples here, with the incoming call of our car’s HMI, let’s say we have a warning screen for the engine somewhere in our flow, which also uses a wildcard and can come into any screen at any time if it received a signal. Now we would add this engine warning screen to the blacklist of our incoming call screen. Meaning that now our incoming call screen can appear in any screen except our engine warning screen.
We think with these set of tools you can start to model the real complexity of a UI, going far beyond simple click dummy mockups and lo-fi prototypes.
Connecting Signals from components.
Simple clickable areas are great for prototyping but what about when we want to use the real signals from our UI screens to control the flow of our application? In the next part of this blog post we will look at how to use the flow action areas to listen to signals from the components of our flow screens and connect these to our flow design.
Integrating States
Another consideration we had to design around is the existence of states in Qt Design Studio, an existing and powerful part of the workflow that allows you to create states of your UI Screens and track the changes between them. With our flows you can not only transition from any state of a screen into any state of another screen but also use the flow to transition between states of a single screen, mixing the power of QML’s existing features into the new flow mode.


