Apr 3, 2023
Comments
Qt has great tools for designing, developing, and testing Android apps using Qt Design Studio, Qt Creator, and Squish. But sometimes, there is an already existing codebase developed in Android Studio which needs a few functionalities from the Qt framework. This blog post demonstrates how we can integrate a Qt for Android project into an Android Studio Project.
Qt for Android has been designed with the main focus of using Qt in a single Activity or Service. For this reason, navigation does not work exactly like in regular Android apps. Also, due to the nature of Android, it is not possible to embed the QtActivity into another Activity while using the public Android SDK.
Building and running the demo
We will be making a simple app to demonstrate QtActivity working in an Android Studio project. In this app, we send messages from Android to Qt for changing the color of a QML rectangle based on the button pressed on the Android side.
On the Qt side, we have a rectangle whose color we would change from the Android activity.
On the Android side, we have just two buttons that set the color of the rectangle to green or cyan.
Build the Qt project targeting the Android platform. Instructions for building using Qt Creator can be found here. This creates an "android-build" folder in the build directory of the Qt project. This folder is a standalone Android project which you can open in Android Studio and edit. For our use case, we will be copying parts of it to our Android Studio project.
Android Project = The folder created by Android Studio containing your Android project.
Qt Build = The "android-build" folder generated by QtCreator when you build your project targeting Android. Usually, the path looks like "/QtProjects/build-ProjectName-Qt_version-DebugOrRelease/android-build".
-
Copy the files from <Qt Build>/libs to <Android Project>/app/libs
-
Copy <Qt Build>/assets/ folder to <Android Project>/app/
The folders to copy from <Qt Build> are shown below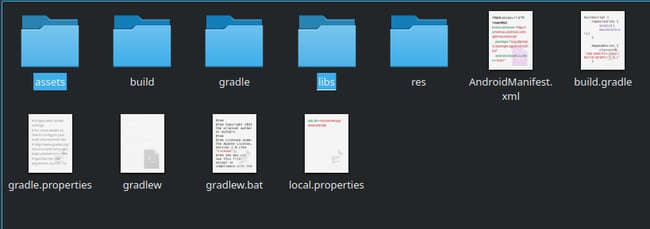
-
Copy <Qt Build>/res/values/libs.xml to <Android Project>/app/src/main/res/values
-
In <Qt Build>/gradle.properties copy the "qtAndroidDir" property to <Android Project>/gradle.properties
The property to copy in <Qt Build>/gradle.properties is shown below... qtAndroidDir=/home/user/Qt/6.4.2/android_arm64_v8a/src/android/java ... -
Copy the <activity> tag of the QtActivity from <Qt Build>/AndroidManifest.xml and paste it into the AndroidManifest.xml of the <Android Project> and remove the MAIN Intent filter. Copy the relevant permissions as well.
Also change the property "android:launchMode" from "singleTop" to "singleInstance". This helps with navigation between Android Activity and QtActivity.
The activity tag in <Android Project>'s AndroidManifest.xml is shown below (cropped)<activity android:name="org.qtproject.qt.android.bindings.QtActivity" android:configChanges="orientation|uiMode|screenLayout|screenSize|smallestScreenSize|layoutDirection|locale|fontScale|keyboard|keyboardHidden|navigation|mcc|mnc|density" android:label="appAndroidTest" android:launchMode="singleInstance" android:screenOrientation="unspecified" android:exported="true"> <meta-data android:name="android.app.lib_name" android:value="appAndroidTest" /> <meta-data android:name="android.app.arguments" android:value="" /> <meta-data android:name="android.app.extract_android_style" android:value="minimal" /> </activity> -
In <Android Project>/app/build.gradle add the following code
...
dependencies {
	implementation fileTree(dir: 'libs', include: ['*.jar', '*.aar'])
}
...
android {
...

// Extract native libraries from the APK
packagingOptions.jniLibs.useLegacyPackaging true

  sourceSets {
    main {
      java.srcDirs += [qtAndroidDir + '/src']
      aidl.srcDirs += [qtAndroidDir + '/src']
      resources.srcDirs = ['resources']
      assets.srcDirs = ['assets']
      jniLibs.srcDirs = ['libs']
    }
  }
}
How it works
Establishing communication between Qt and Android
Since we copied the native libs to the Android Studio project, we can communicate between Java and C++ using the Java Native Interface (JNI). Luckily, Qt provides a lot of helper functions for this. For communication, we would use JSON strings since they are natively accessible in QML (which has a JavaScript engine).
Note: Anytime you make changes to the Qt project, you will need to copy assets and libs folder from <Qt Build> to <Android Project> again (steps 1 and 2 in the previous section).
Qt side
On the Qt side, we create a new class "JniMessenger". The header file is shown below.
class JniMessenger : public QObject
{
    Q_OBJECT
    QML_NAMED_ELEMENT(JniMessenger)
    QML_SINGLETON

private:
    explicit JniMessenger(QObject *parent = nullptr);

public:
    Q_INVOKABLE void sendMessageToJava(const QString &message);
    static JniMessenger *instance();
    static JniMessenger *create(QQmlEngine *qmlEngine, QJSEngine *jsEngine);

signals:
    void messageReceivedFromJava(QString message);
};
The class is exposed to QML as a singleton. The signal gets emitted whenever there is a message from Java. Since we are making the class a singleton, make the constructor private, and add a "create" function. This function is called by QML when instantiating this class. More information about exposing a singleton class to QML can be found here.
JniMessenger *JniMessenger::instance()
{
    static JniMessenger instance;
    return &instance;
}

JniMessenger *JniMessenger::create(QQmlEngine *qmlEngine, QJSEngine *jsEngine)
{
    Q_UNUSED(qmlEngine)

    JniMessenger *singletonInstance = JniMessenger::instance();

    // The engine must have the same thread affinity as the singleton.
    Q_ASSERT(jsEngine->thread() == singletonInstance->thread());

    return singletonInstance;
}
Add this function to the class for sending messages to Java. This function calls a static method on the Java side which we will create later. The javaMessageHandlerClass is defined using the new JNI syntax, "Q_DECLARE_JNI_CLASS(javaMessageHandlerClass, com/example/androidapp/MainActivity)". Read this blog post by Volker to learn more about the new JNI syntax. It replaces the string signatures used in JNI method calls with predefined class and type signatures.
void JniMessenger::sendMessageToJava(const QString &message)
{
    QJniObject::callStaticMethod<void, jstring>(
                QtJniTypes::className<QtJniTypes::javaMessageHandlerClass>(),
                "receiveMessageFromQt",
                QJniObject::fromString(message).object<jstring>());
}
Now add the following code outside the class. The sendMessageToQt function is a native method declared in Java and defined here. It sends messages from Java to Qt. The JNI_OnLoad function is called by JNI and this is where you should register all your native methods. Using the new JNI syntax, the registering of native methods got easier as shown in the code.
void sendMessageToQt(JNIEnv *env, jclass cls, jstring message)
{
    Q_UNUSED(cls)

    QString string =  env->GetStringUTFChars(message, nullptr);

    emit JniMessenger::instance()->messageReceivedFromJava(string);
}
Q_DECLARE_JNI_NATIVE_METHOD(sendMessageToQt)

JNIEXPORT jint JNICALL JNI_OnLoad(JavaVM *vm, void *reserved)
{
    Q_UNUSED(vm)
    Q_UNUSED(reserved)

    static bool initialized = false;
    if (initialized)
        return JNI_VERSION_1_6;
    initialized = true;

    // get the JNIEnv pointer.
    QJniEnvironment env;
    if (!env.isValid())
        return JNI_ERR;

    const jclass javaClass = env.findClass(
                QtJniTypes::className<QtJniTypes::javaMessageHandlerClass>());
        if (!javaClass)
            return JNI_ERR;

    static JNINativeMethod methods[] = { Q_JNI_NATIVE_METHOD(sendMessageToQt) };

    // register our native methods
    if (!env.registerNativeMethods(javaClass, methods, std::size(methods)))
        return JNI_ERR;

    return JNI_VERSION_1_6;
}
In the main function, add the following code.
QTimer::singleShot(0, [argc, argv]() {
	if (argc > 1) {
    	emit JniMessenger::instance()->messageReceivedFromJava(argv[1]);
    }
});
One of the problems with loading QtActivity as a second activity is that the native libraries are not yet loaded, so we cannot call the native methods yet. Therefore, we make use of Android Intents to pass the data for the first time and then regular native function calls from then onwards. The Android side shows the correct way to send Intent data to Qt. The QTimer::singleShot with 0 ms delay puts the signal emitted into the main event loop, to make sure QML has time to catch it.
Finally, on the QML side, add the functionality to the button and create a connection to listen to the signal. When the button is clicked, it sends a JSON string to Java with the single property: 'navigate': "back". This tells Java to load the start of the first activity again. When we receive a message from Java, we look for a property of 'color' and set the rectangle color to that.
Window {
  	...
    Rectangle {
        focus: true
        Keys.onReleased: function(event) {
            if (event.key === Qt.Key_Back) {
                console.log("Back key pressed");
                event.accepted = true;

                JniMessenger.sendMessageToJava(JSON.stringify(
                   {
                        navigate: "back"
                   }
                ));
            }
        }
    }

    Connections {
        target: JniMessenger
        function onMessageReceivedFromJava(message) {
            const data = JSON.parse(message);

            for (let key in data) {
                if (data.hasOwnProperty(key)) {
                    console.log("Setting " + key + " to " + data[key]);

                    if (data.color) {
                        rectangle.color = data.color;
                    }
                }
            }
        }
    }
    ...
}
Android side
On the Android side, we add new static methods to be called from the Qt side. The "MessageFromQtListener" is an interface used for adding a listener for messages from Qt. We also have a native method "sendMessageToQt" which we already defined on the Qt side. The following is the MainActivity class.
public class MainActivity extends AppCompatActivity {

    private interface MessageFromQtListener {
        public void onMessage(String message);
    };

    private static final String TAG = "Android/MainActivity";

    private static boolean firstTime = true;

    private JsonHandler jsonHandler;

    private static MessageFromQtListener m_messageListener;

    public static native void sendMessageToQt(String message);

    public static void setOnMessageFromQtListener(MessageFromQtListener listener) {
        m_messageListener = listener;
    }

    public static void receiveMessageFromQt(String message) {
        Log.d(TAG, "Message received from Qt: " + message);
        if (m_messageListener != null) {
            m_messageListener.onMessage(message);
        }
    }

    @Override
    protected void onCreate(Bundle savedInstanceState) {
        super.onCreate(savedInstanceState);
        setContentView(R.layout.activity_main);

        jsonHandler = new JsonHandler();

        MainActivity.setOnMessageFromQtListener(new MessageFromQtListener() {
            @Override
            public void onMessage(String message) {
                try {
                    JSONObject jsonObject = new JSONObject(message);
                    Map<String, Object> json = JsonHandler.toMap(jsonObject);

                    if (json.containsKey("navigate") &&
                            Objects.equals((String) json.get("navigate"), "back")) {
                        Intent intent = new Intent(getApplicationContext(), MainActivity.class);
                        startActivity(intent);
                    }
                } catch (JSONException e) {
                    Log.e(TAG, "Not valid JSON: " + message);
                }
            }
        });
    }

    public void onBtnClicked(View view) {
        String color = ((Button) view).getText().toString().toLowerCase();
        Log.d(TAG, color);

        Intent intent = new Intent(MainActivity.this, QtActivity.class);
        intent.addFlags(Intent.FLAG_ACTIVITY_NO_ANIMATION);
        if (!firstTime) {
            MainActivity.sendMessageToQt(jsonHandler.buildJson("color", color).toString());
        } else {
            intent.putExtra("applicationArguments",
                    jsonHandler.buildJson("color", color).toString());
            firstTime = false;
        }
        startActivity(intent);
    }
}
onBtnClicked is called by the XML and sends a JSON string to the QML that updates the color. As explained on the Qt side, until the QtActivity is loaded, we can't call the native methods, therefore we make use of the "m_qtLibsLoaded" variable. When it is true, we make use of the regular native calls. When it is false, we load the QtActivity and pass Intent data to it. The QtActivity looks for an Intent field named "applicationArguments" while loading the libraries and passes them to the C++ code as environment variables. These can be accessed in the main function using the argv argument.
That is all that should be needed for running a QtActivity from an Android Studio project.
Blog Topics
Related Articles

Qt for MCUs 2.12.2 LTS Released
Qt for MCUs 2.12.2 LTS has been released and is available for download...
Read Article
A Cross-Platform Rust UI Framework via Qt’s Bridging Technology
Rust has achieved something extraordinary: it genuinely excites people to..
Read Article
Qt Bridges: Public Beta for the Rust Bridge Is Out!
Qt Bridges is a project we have been developing since 2025 to bring Qt’s..
Read Article