Oct 1, 2021
This post is a refresher about some features of the qml binary that is installed along with the Qt SDK, which should help to explain why we now prefer to use it, rather than older tools like qmlscene and qmlviewer.
Some history
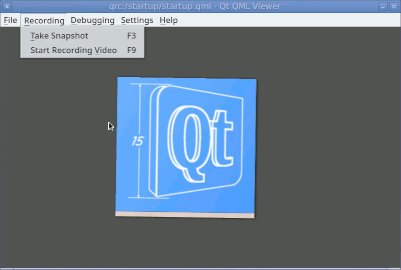
I'll start by summarizing the history of QML interpreters over the last decade. Qt 4 used to ship a development tool called qmlviewer for Qt Quick 1, back when we only had Graphics View and QPainter to do the rendering. When the scene graph was introduced to enable modern hardware-accelerated graphics, with batching to minimize the number of draw calls, a new tool was introduced, called qmlscene. These two used to live side-by-side. Both were purely development tools, suitable for rapid prototyping of QML, so that you didn't need to write a C++ launcher application before you could even start. At that time, your top-level QML element was always some sort of Item: the idea was that you start with a blank canvas (any item), develop the look and feel of the UI within it, and then probably incorporate it into a larger C++ application. A minority of developers also believed in the idea that QML could be used as a scripting language, that there could be such a thing as a pure QML application. (After all, you have a complete JavaScript engine available.) Neither of those rapid-prototyping tools were suitable for end users to run applications though.
We also needed to add support for multiple windows, because many UIs need dialogs and pop-up windows; so the Window type was created by subclassing QWindow, and we've been living with the consequences of that ever since (some good, some bad). The next logical step was that you could start with a Window rather than an Item. You can still create a UI either way: if you use a Window, your main.cpp should create a QQmlApplicationEngine; if you use an Item or any subclass, you normally create a QQuickView to display it in. However, Items (like Widgets) are composable (arbitrary nesting is allowed), whereas a Window is always a separate scene on your multi-window desktop. Nesting the declaration of a Window inside another UI does not imply composition, but rather associates it as a transient window in the windowing system. It's useful though if the UI of one application, or some fragment of an application, can also be reused inside another larger application without changing the QML code. You could design most of your application as a composition of nestable Item-based components, and use Window just for dialogs and popups; but you also might need a main ApplicationWindow so that you can add a menu bar, and set the window title.
When Window was introduced, qmlscene had to learn to deal with both of those cases, which introduced a wrinkle into the code: it needs to preload the qml file and then decide which class is going to host it. (Your application's main.cpp probably only needs to load one kind of top-level object.) qmlviewer, with all the extra functionality available on its menubar, was simply left behind. If you develop a desktop application in QML, it probably needs its own custom menubar, so you probably want to use Qt Quick Controls or Qt.labs.platform to build that.
The qml executable, which we have been calling the QML Runtime, was introduced in 2013. Here's an old video that explains the motivation and the use cases that it was designed for. Unlike qmlscene, the qml runtime is able to run a qml file from the command line or from the graphical shell (finder, explorer, dolphin etc.) It always starts with a QQmlApplicationEngine, and it deals with top-level non-window items by detecting and wrapping them into windows, in a configurable way, rather than by creating a QQuickView. The intention was that qml should eventually replace qmlscene for rapid-prototyping purposes as well: its functionality is a superset, it's designed to be extensible, it makes fewer assumptions about the contents of the qml file, the implementation is a bit more elegant, and it has a nicer name. In this post I'm mostly going to be giving more information around what was presented in that video and how it has evolved since.
Scenery
As explained in the video, when your top-level declaration is not a Window, that's what the qml runtime calls a "partial scene": if it's an Item, it needs to be wrapped into a Window in order to become visible. This aspect is configurable: the qml runtime tool reads another qml file to decide how to do that. The built-in configurations are bundled as resources inside the qml executable, and you can select one using the --config option. qml uses QCommandLineParser nowadays, so the --help option will tell you about the other options; from that, you can see that it has a --list-conf option, and here's the output:
Built-in configurations:
 default
 resizeToItem
The default configuration makes the wrapper window behave much like qmlscene does by default: when you resize the window, the Item that you declared will be resized to fit the window. The resizeToItem configuration is equivalent to the qmlscene --resize-to-root option and the QQuickView::SizeViewToRootObject enum: when you programmatically change the size of your root Item, the wrapper window will be resized to fit (to the extent that your windowing system allows it). This mechanism was the one we used before Window was introduced, as a way for an Item-based application to control its own default size.
Let's look at how that's implemented. First the configuration file, located in the source tree in qtdeclarative/tools/qml/conf/resizeToItem.qml:
import QmlRuntime.Config 1.0

Configuration {
   PartialScene {
     itemType: "QQuickItem"
     container: "content/resizeWindowToItem.qml"
  }
}
which simply says that if the partial scene's root is a QQuickItem, its container should be loaded from resizeWindowToItem.qml, a wrapper which is defined like this:
import QtQuick.Window 2.0
import QtQuick 2.0

Window {
   property Item containedObject: null
   onContainedObjectChanged:  {
       if (containedObject == undefined || containedObject == null) {
           visible = false;
           return;
       }
       width = Qt.binding(function() { return containedObject.width });
       height = Qt.binding(function() { return containedObject.height });
       containedObject.parent = contentItem;
       visible = true;
   }
}
So an Item can acquire a Window at runtime, with Javascript callbacks to handle reparenting and resizing. But actually, we can add other features to this wrapper Window: for example, we can add the sorts of features that qmlviewer used to have. The features I miss the most are that it was easy to capture screenshots, or record an animated gif to easily share what some animation looks like. Let's start by adding a MenuBar with menu items to be able to open a different QML file, quit the application, and to record a timed series of screenshots.
Homesteading
Most Linux programs store their configuration in your home directory under ~/.config, so let's do this: mkdir -p ~/.config/QtProject/Qml Runtime/qmlviewer (it's possible to put these files anywhere, but it makes things easier to use the path that corresponds to QStandardPaths::AppConfigLocation. In 6.3, we will take advantage of this convention.) Create a configuration.qml file:
import QmlRuntime.Config 1.0

Configuration {
  PartialScene {
        itemType: "QQuickItem"
        container: Qt.resolvedUrl("ItemWrapper.qml")
    }
}
and then ItemWrapper.qml, like this (compatible with recent 5.x and 6.x):
import QtQuick 2.12
import QtQuick.Window 2.12
import QtQuick.Controls 2.12
import Qt.labs.platform 1.1 as Platform

ApplicationWindow {
  id: root
  property Item containedObject: null
  property bool __resizeGuard: false
  onContainedObjectChanged: {
    if (containedObject == undefined || containedObject == null) {
      visible = false;
      return;
    }
    __resizeGuard = true
    width = containedObject.width;
    height = containedObject.height + menuBar.height;
    containedObject.parent = contentItem;
    visible = true;
    __resizeGuard = false;
  }
  onWidthChanged: if (!__resizeGuard && containedObject) containedObject.width = width
  onHeightChanged: if (!__resizeGuard && containedObject) containedObject.height = height
  Component.onCompleted: console.log("startup args", Qt.application.arguments)

  Rectangle {
    id: recordingIndicator
    color: "red"
    anchors.right: parent.right
    radius: 5; width: radius * 2; height: width; z: 1; antialiasing: true
    visible: grabTimer.running
  }

  Timer {
    id: grabTimer
    running: false; repeat: true; interval: 1000
    onTriggered: {
      containedObject.grabToImage(function(result) {
        var path = Platform.StandardPaths.writableLocation(Platform.StandardPaths.DocumentsLocation).toString().replace('file://','') +
            "/qml-screenshot-" + (new Date()).toISOString().replace(/:/g,".") + ".png";
        var success = result.saveToFile(path);
        console.log((success ? "saved " : "failed to save ") + path)
      });
    }
  }

  menuBar: MenuBar {
    Menu {
      title: qsTr("&File")
      Action {
        text: qsTr("&Open")
        shortcut: StandardKey.Open
        onTriggered: openDialog.open()
      }
      Action {
        text: qsTr("&Quit")
        shortcut: StandardKey.Quit
        onTriggered: close()
      }
    }
    Menu {
      title: qsTr("&Recording")
      Action {
        text: qsTr("&Begin")
        onTriggered: grabTimer.start()
      }
      Action {
        text: qsTr("&End")
        onTriggered: grabTimer.stop()
      }
    }
  }

  Platform.FileDialog {
    id: openDialog
    fileMode: Platform.FileDialog.OpenFile
    selectedNameFilter.index: 1
    nameFilters: ["QML files (*.qml)"]
    onAccepted: {
      var component = Qt.createComponent(file);
      if (component.status === Component.Ready) {
        if (containedObject)
          containedObject.parent = null
        containedObject = component.createObject(root.contentItem)
      }
    }
  }
}
We can try to run with it, like this:
$ qml -c ~/.config/QtProject/Qml\ Runtime/qmlviewer/configuration.qml myapp.qml
Now if you use the Open menu item, depending on your platform you might get a warning:
ERROR: No native FileDialog implementation available. Qt Labs Platform requires Qt Widgets on this setup.
And that brings us to another feature of the qml runtime: we need to add the extra argument -a widget to make Qt Widgets available when running on a platform where the "native" dialog is a QFileDialog (as on my plain-X11 desktop). The qml runtime defaults to using a QGuiApplication, but you can use -a to tell it to create a QCoreApplication or a QApplication instead, depending on what you need. (qmlscene always uses QApplication.)
The need for that will soon be alleviated however: we've been porting Qt Quick Dialogs forward, starting with FileDialog ; it will use a native dialog if available, and fall back to a QML dialog implementation using Qt Quick Controls, but we no longer have any dependency on widgets. It's available in Qt 6.2; so in a future post, I can show you how to remove that dependency, and add more features.
If you are a Mac user, you might prefer to use the MenuBar implementation in Qt.labs.platform, so that the menus will be on the main menubar, instead of creating another menubar inside the window.
I've used this Timer-based technique in the past, to create a gif animation for a blog post. After you have done some recording for a while and have a directory full of png screenshots, there's more than one way to animate them; one simple way with imagemagick is like this:
$ convert -delay 10 -loop 0 qml-screenshot-*.png anim.gif
A reminder in case it wasn't clear already: a qml custom configuration specifies how to wrap an Item into a Window. It will not be applied when the qml application that you are testing already has a Window declared as its top-level object.
QML scripting
The techniques presented here are a bit off the beaten path. Building applications that use too much JavaScript is usually not the best architecture for high performance. Further, when you interpret QML at runtime, you're missing some benefits from qmlcachegen, that you get when you build a standalone application or module. Often you need to write some C++ code for your application anyway, because we don't have prefabricated modules to do everything that applications need to do. End-users may not expect to run qml scripts, and it's not even possible on the mobile platforms; so "real applications" tend to need at least a boilerplate main.cpp, and then you can also compile or bundle your qml to generate a monolithic executable. But writing your own QML plugins in C++ to add functionality is not too hard; you can install them into a standard location where the QML Runtime can find them, and then use those extra imports in your qml files. We highly recommend the use of explicit imports in your qml files, rather than dependency injection. There are other C++ QML extensions available, besides the ones that ship with Qt. Perhaps we will start seeing more third-party plugins available for installation, and in the Qt Marketplace as well. And the more modules you have installed on your system, the more you can do with "pure" qml scripts.
In fact, it's a fun sport to try to build a complete application in a single QML file. I wrote one of these a few years ago with Qt 5: https://github.com/ec1oud/icongen.qml The new inline component syntax makes single-file apps a little easier: you can declare a named component inline, and then instantiate it multiple times with simple uppercase declarations, just as if it had been loaded from a separate file. One more trick you might find useful is the shebang mechanism, so that the qml file can be made directly executable:
#!/usr/bin/env qml
import QtQuick 2.0

Text {
    text: "Hello world"
}
Of course that's not very portable: it only works in a Unix-style shell, and only when qml is a binary that can be found in your $PATH. In Qt 5, qml.app is an app bundle on macOS; so to get that working, you need some sort of wrapper, like qtchooser or a script, that can be in your path. So far in Qt 6, qml on macOS is just a plain binary; this has its pros and cons, but one of the pros is that the shebang mechanism works directly. The main con is that it doesn't integrate so nicely into Finder.
Don't forget when you declare a top-level Window to declare visible: true if you want it shown at startup. qmlscene would set it visible for you; qml does not, because we don't presume that's what you want: maybe your application has extra windows for specific purposes, to be shown later. But an Item is visible by default, in its wrapper window.
Conclusion
We consider the qml runtime tool to be mature enough now that we are deprecating qmlscene. It will be removed eventually. You should use qml from now on. As you can see, it's suitable for more use cases in the field, and also extensible so that you can add features that you may have been missing. If you come up with any ideas about features that could be added in this way, we'd love to hear about them.