CASE STUDY
Building a Digital Cockpit Concept with Qt
Welcome to Outrun – an automotive UI demo showcasing the possibilities of building a multi-screen digital cockpit with Qt!
Let us walk you through what it takes to design, develop and deploy a digital cockpit with Qt. With this demo we explore the upcoming trends of car HMI design and next-gen user experience.
Project Outrun
We wanted to step in our customers' shoes and experience firsthand what it takes to imagine the future of the driving experience - and then bring that vision from idea to reality.
Follow us on a journey from early design exploration to UI implementation, visual effect creation, building connectivity, and running all of it on the target environment.
Let's start the walkthrough with a video presenting the Outrun digital cockpit.

New Features - 2023
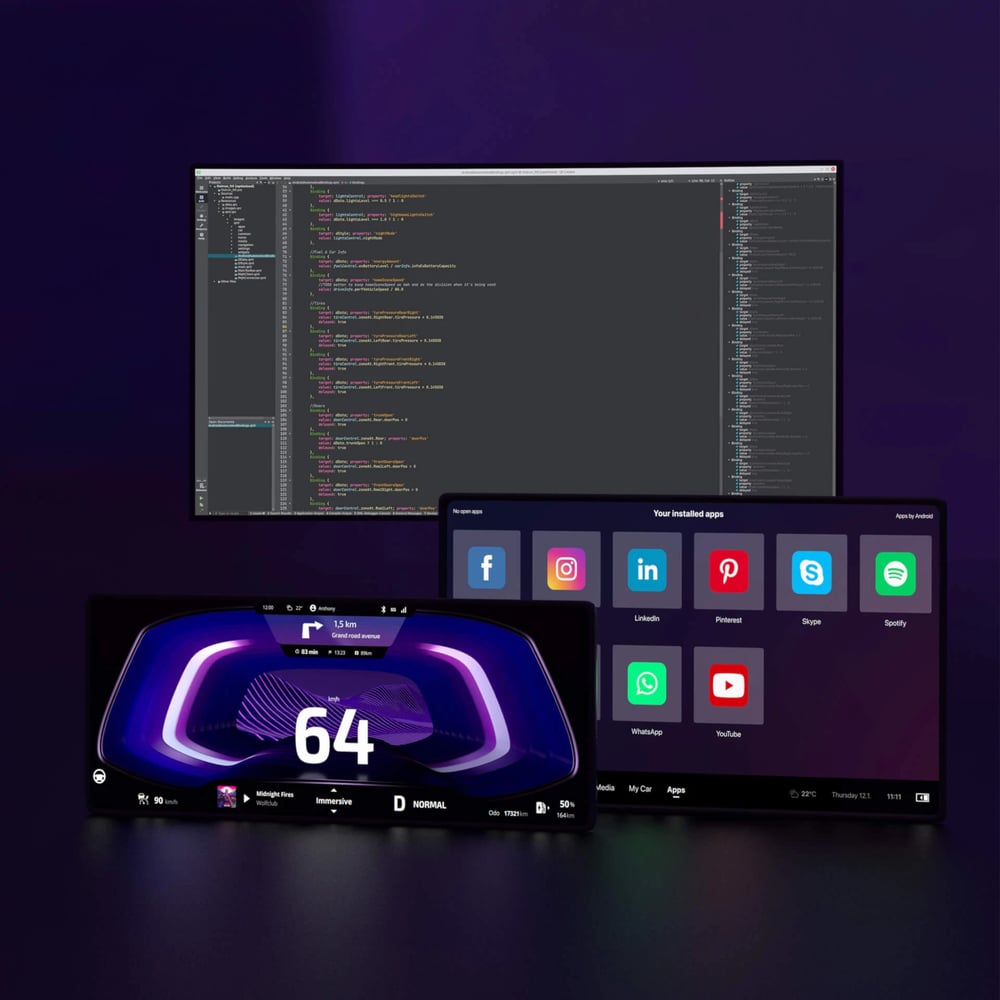
The Outrun HMI concept is constantly evolving to reflect new automotive trends, include new technological advances, and showcase Qt framework's capabilities. During the past few months we have included a number of new features that bring it closer to a production-grade Automotive HMI. Together with maps and navigation, we now have the possibility to access third-party apps paving the way to dedicated functionality for the passengers' screens. Some effort has been put into fully integrating Android Automotive with Outrun, to showcase the capabilities of Qt for Android Automotive
- Welcome animation
- Qt for Android Automotive
- Map
- Apps
- Extended media
Welcome animation
The cluster application has been upgraded with a visually impressive welcome animation using Qt new line-particle system.
Line particles are included in QtQuick3D (6.4 onward) and are also available in Qt Design Studio for the creation of stunning animations and splash screens in a few clicks.
Particle effects provide a high-quality and immersive experience that engages users from the start.
Qt for Android Automotive
By integrating Android Automotive into its IVI and HVAC, Outrun now showcases the full customization of the AAOS with high-performance, state-of-the-art 2D and 3D graphics and the advanced HMI functionality enabled by the Qt framework.
The HMI properties are now tied to the AA vehicle properties, such as headlights, tire pressure, vehicle speed, fan speed, and more. The notification system relies on Qt for Android Automotive's notification model for extra efficiency and deep integration with the AAOS.
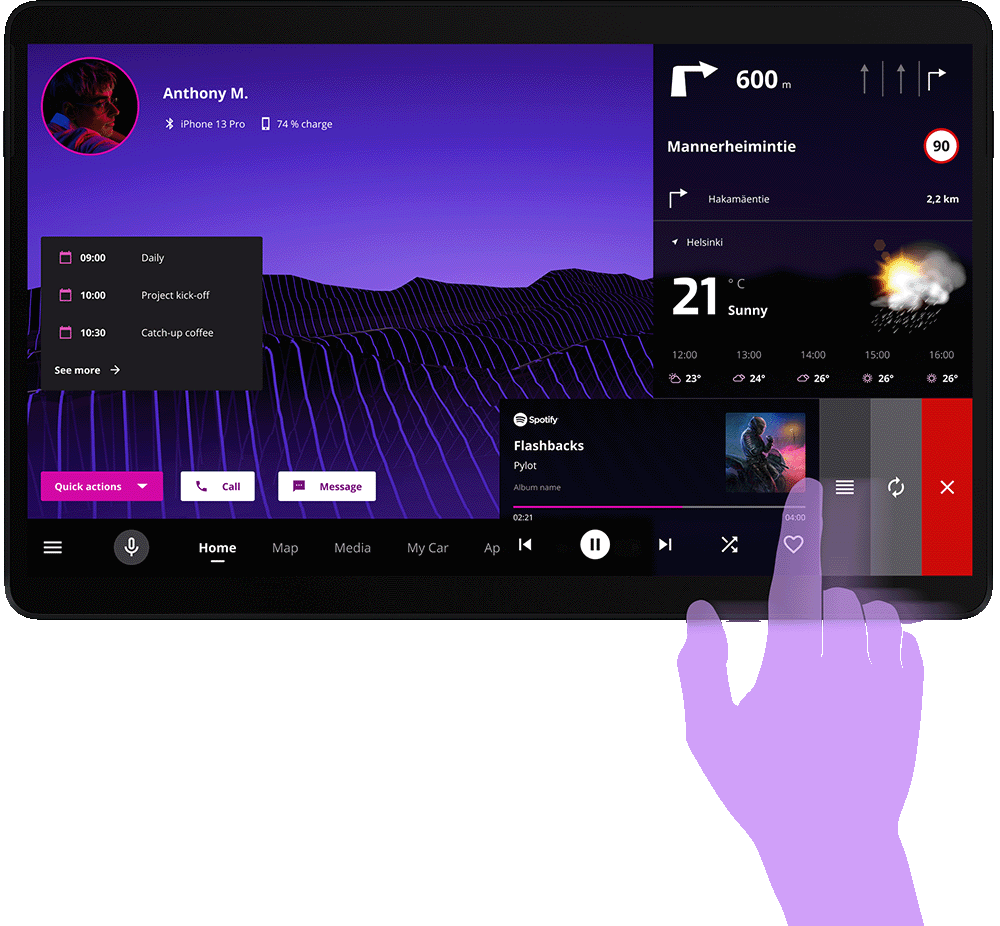
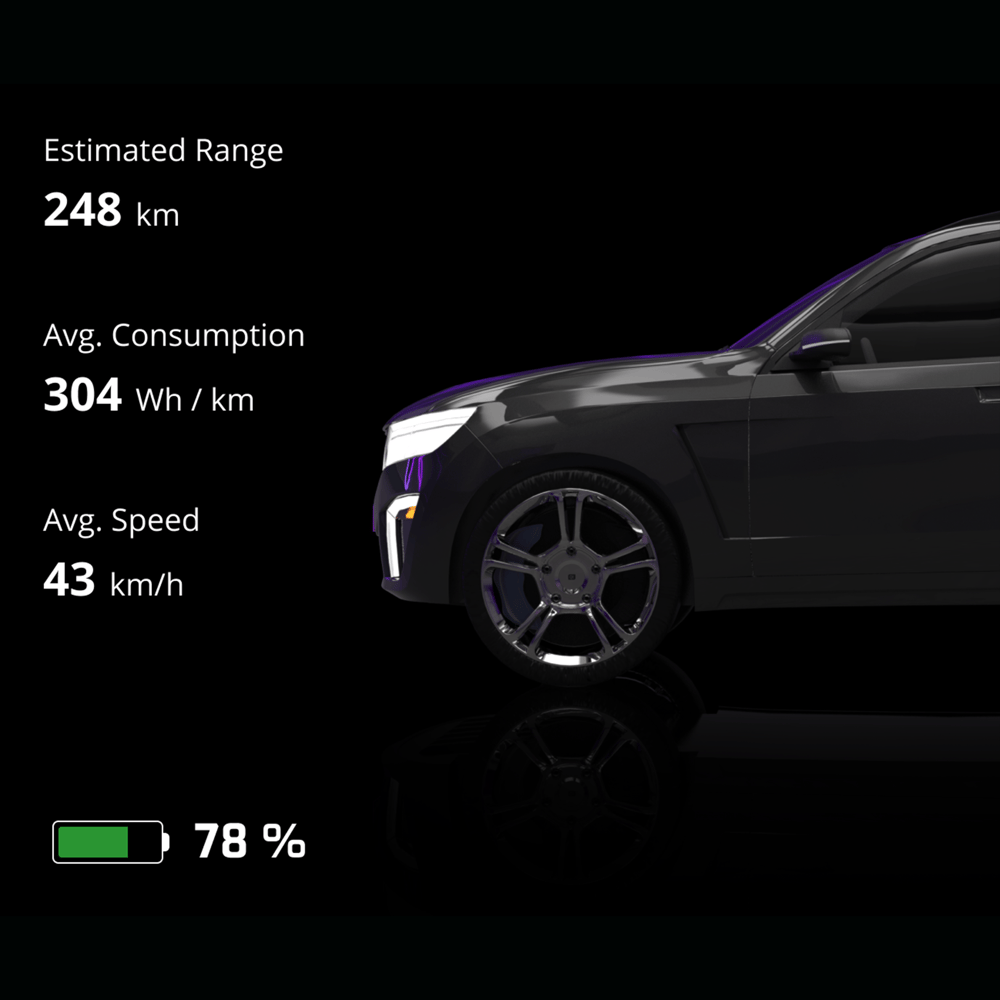
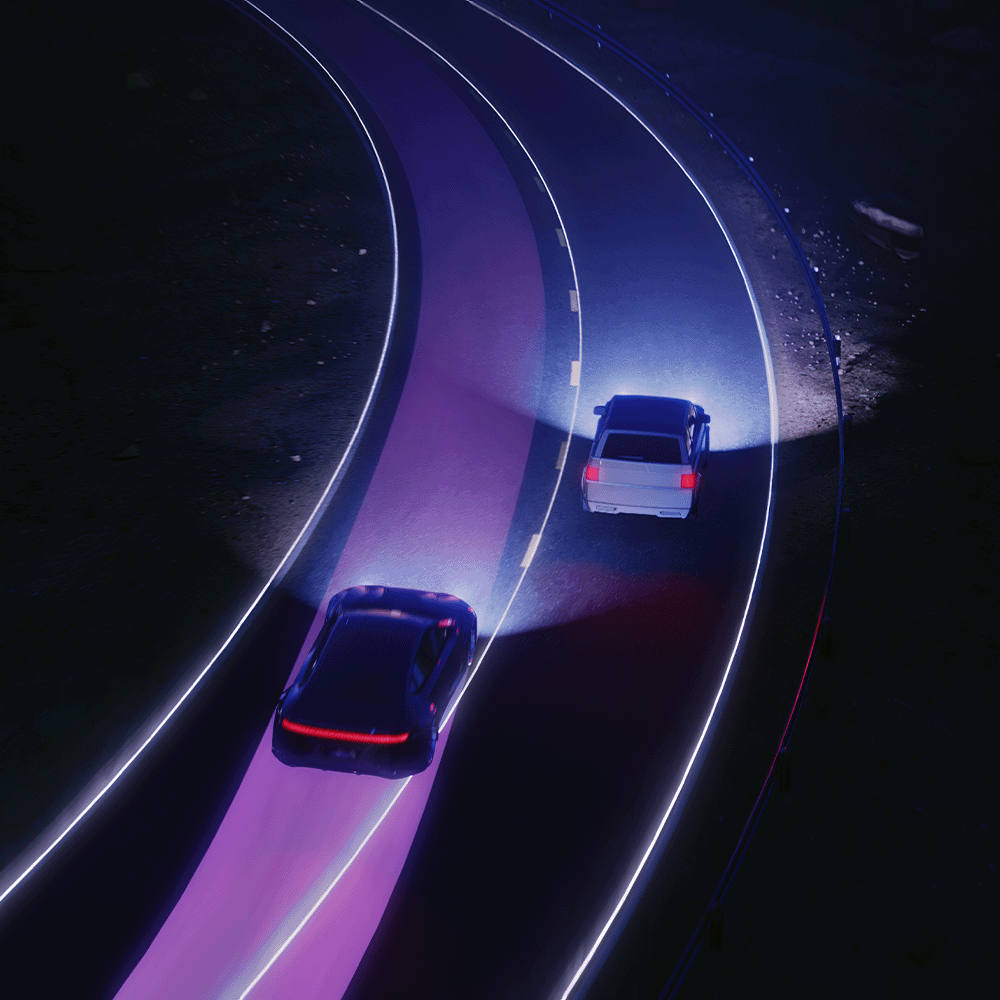
Map
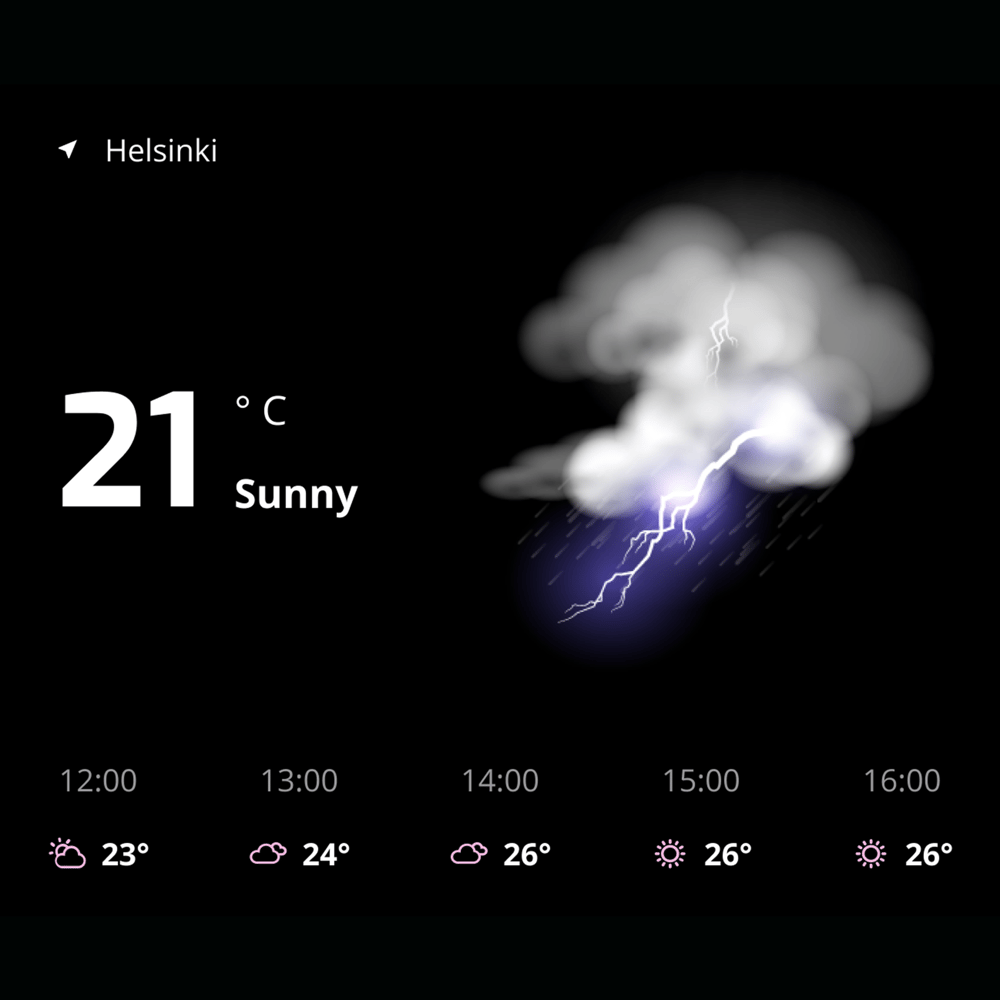
Based on OpenStreetMap and Mapbox, the currently included maps provide advanced rendering and navigation capabilities that users have come to expect from modern mapping applications.
Currently, the Outrun map includes two demo routes showcasing various map features, including turn-by-turn navigation, points of interest, distance and time, energy consumption.
The map rendering is aligned with Outrun's day and night theme, it includes two view perspectives and a zoom-in/out feature.
Apps
Built on top of the Android Activity View system, the app view showcases Qt for Android Automotive's ability to integrate Android (ecosystem's) applications, customize their look and feel, and control their behavior.
Currently, Outrun UI supports up to three-fold split screen and multiple pages, providing users with a versatile and customizable interface for multi-tasking and information management..

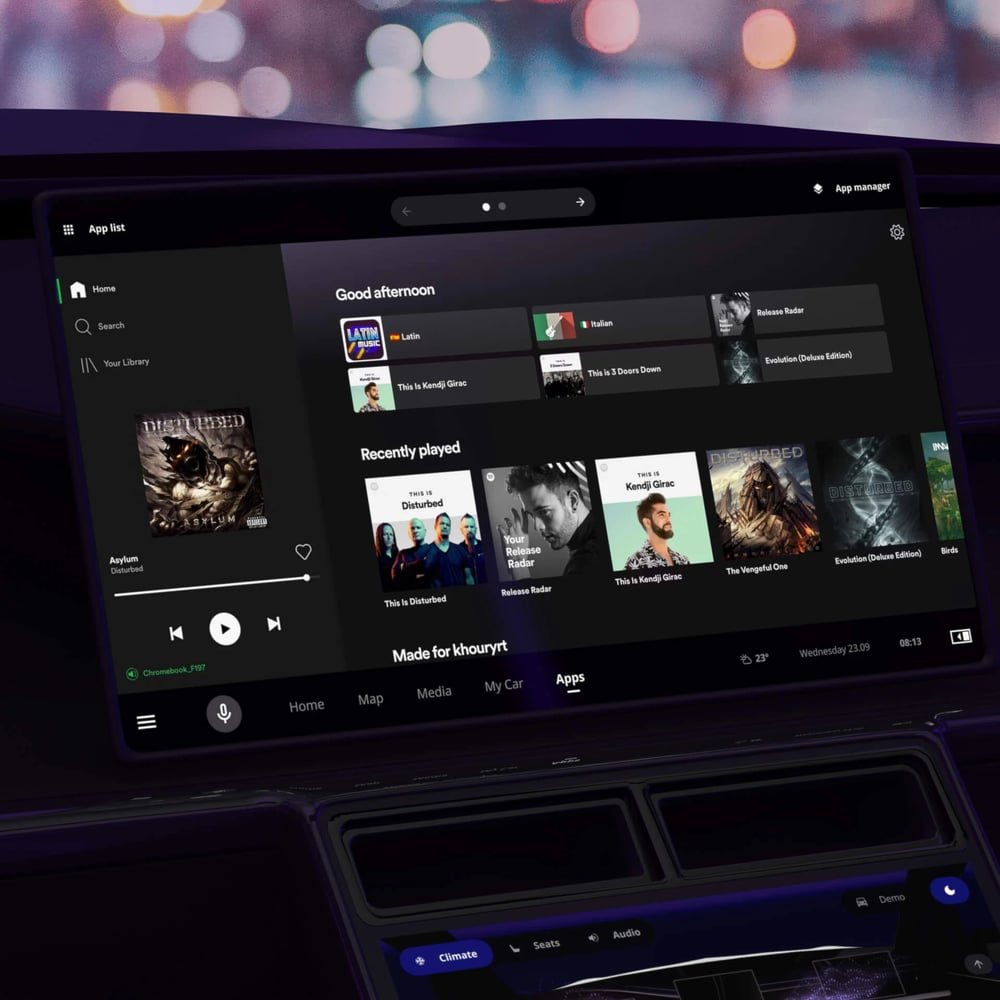
Extended media
The Media view has been enhanced significantly, offering a richer and more complex experience for users. Now, users can not only browse through their music library but also create and manage playlists, as well as create their favorite artists' playlists.
This is just the beginning, as we plan to connect the Media view to various backend data sources in the near future, providing users with an even wider range of content and features.
Design phase
First and foremost, we need to understand what we want to build and why. After defining the goals and requirements, we enter the design concept phase and start seeing the first glimpses of the vision coming to life.
- Research
- Design vision
- Shaping the idea
- User flows and use cases
- UI and interaction
Research
Keeping up with the trends in technology, visual design, and data visualization serves as the starting point for many projects. Our significant source of inspiration for this project has been how the evolving technology landscape changes how we expect to interface with our vehicles.
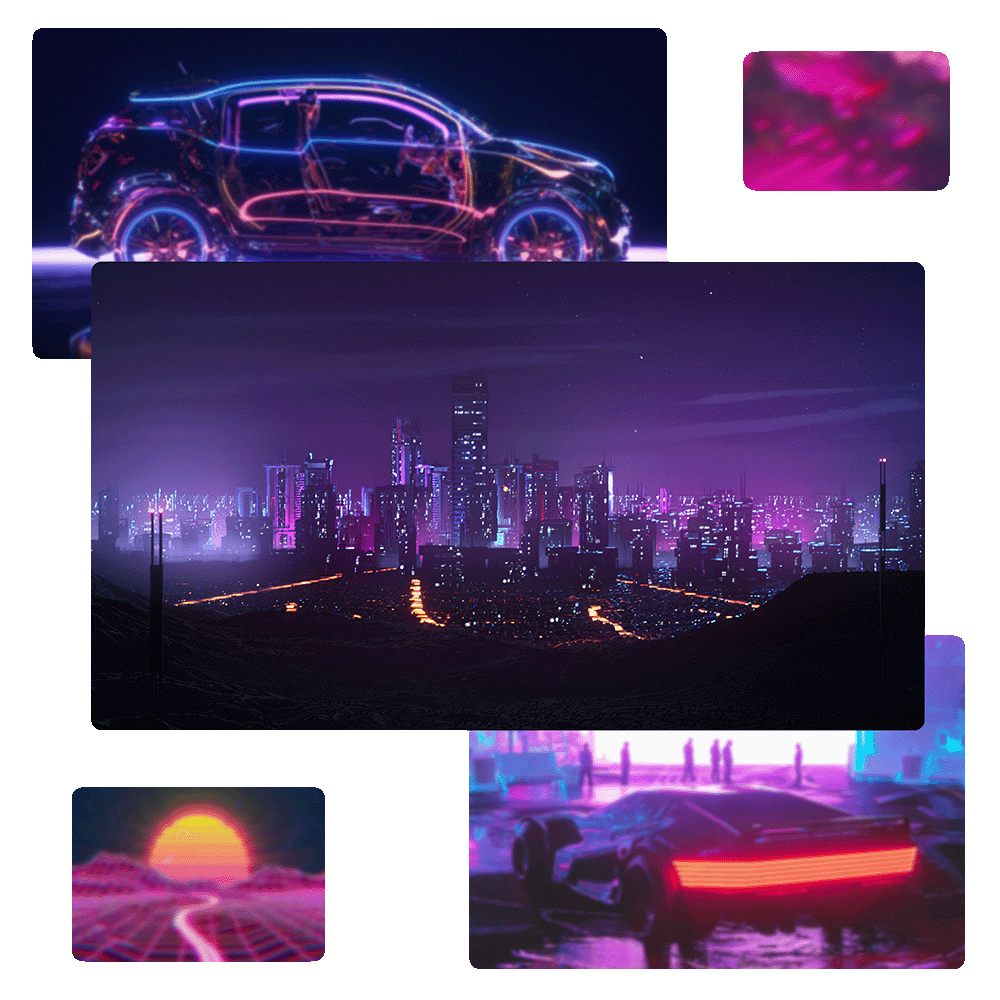
After some research on the topic, we decided to bring in cinematic real-time visualizations of the outside environment, create distinct driving moods with the help of real-time 3D graphics, and draw inspiration from the immersive experiences of video games. Even the demo name and visual style pay homage to the legendary OutRun by Sega and the retro synthwave aesthetics stemming from it.
Design vision
Crafting a design vision is rarely a linear process and often requires trying different things before landing on the final concept. At the start of this process, we were inspired by how movies utilize camera movement to create a sense of scale and the immersive world-building video games have.
Our vision draws inspiration from the retro synthwave aesthetic, the calmness of lo-fi, and the sharpness of cyberpunk. The entire demo pays strong homage to the legendary OutRun by Sega and its visual and musical legacy.
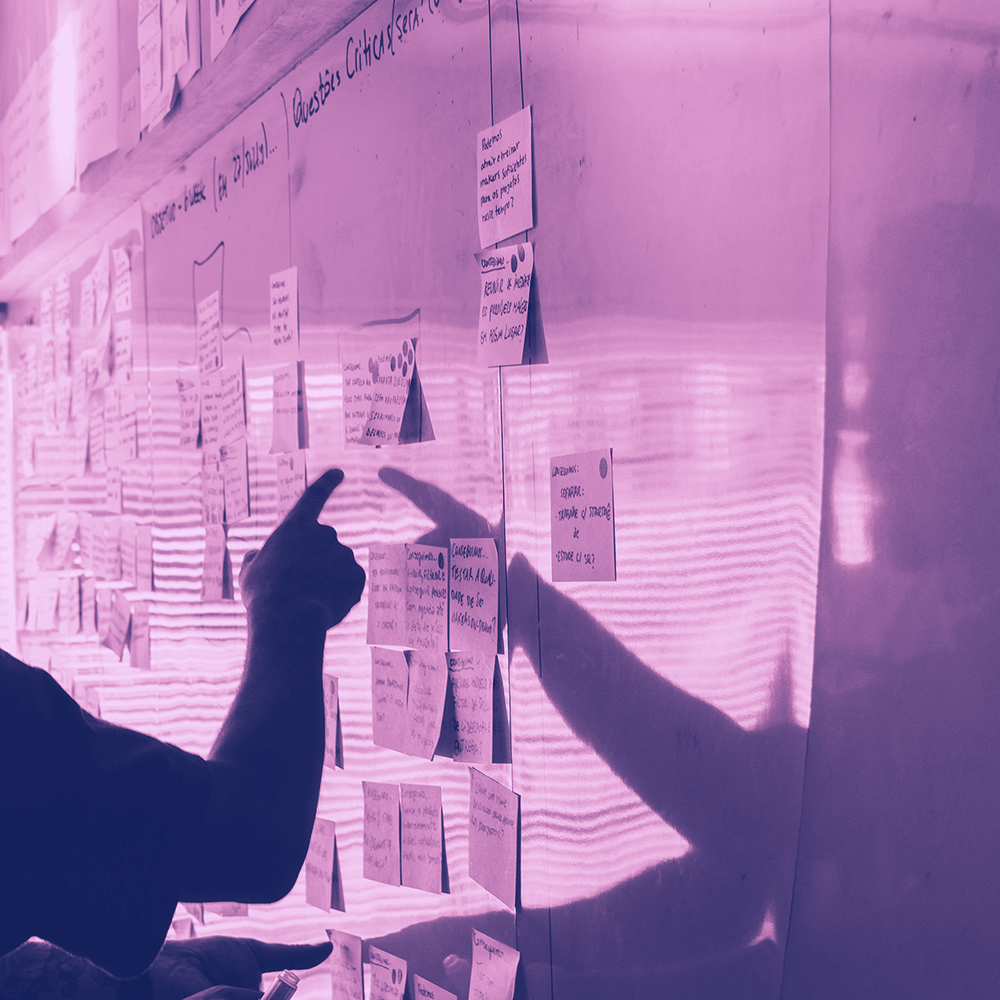
Shaping the idea
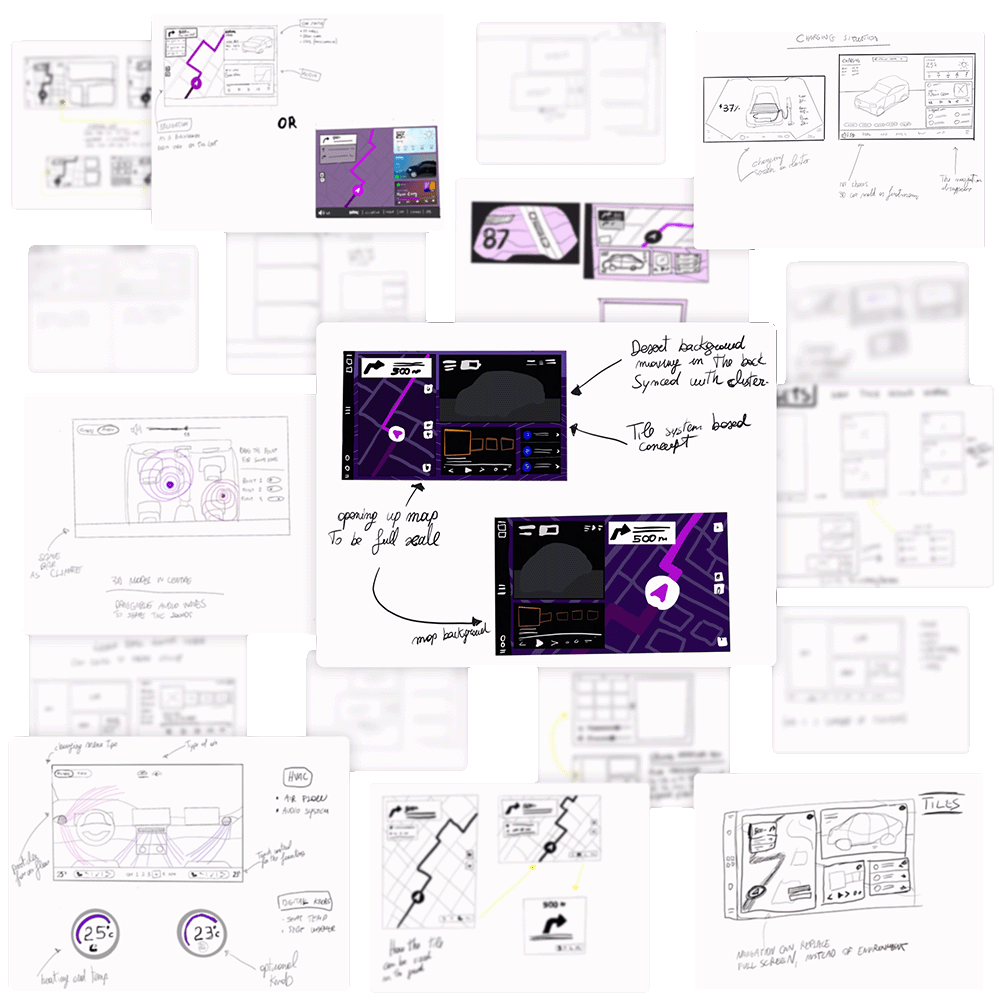
When building a cockpit for a vehicle, compelling visuals are usually the easy part — the cherry on top. The most time-consuming part of the design process is the underlying UX research and definitions. In this phase, many ideas are tried out in black and white. The big picture starts to map out through simple sketches and wireframes.
Test out all the crazy ideas, view them critically, and weed out the clutter. Verify the technical feasibility of ideas and run user test groups to verify your UX hypothesis. At the end of this phase, you should have a clear plan for the end product.
User flows and use cases
In this phase you start assembling all the fundamental interactions. Understanding the users is essential in order to define any user flows. Some useful questions to ask at this point are:
- What are the needs of my user?
- What do they need to achieve through the UI?
- What features are most important to them and why?
- What information is necessary for them to interact with the UI effortlessly?
With these in mind, you can draft the outlines of the user flow, define the key elements, and start building the initial UI assets and components.
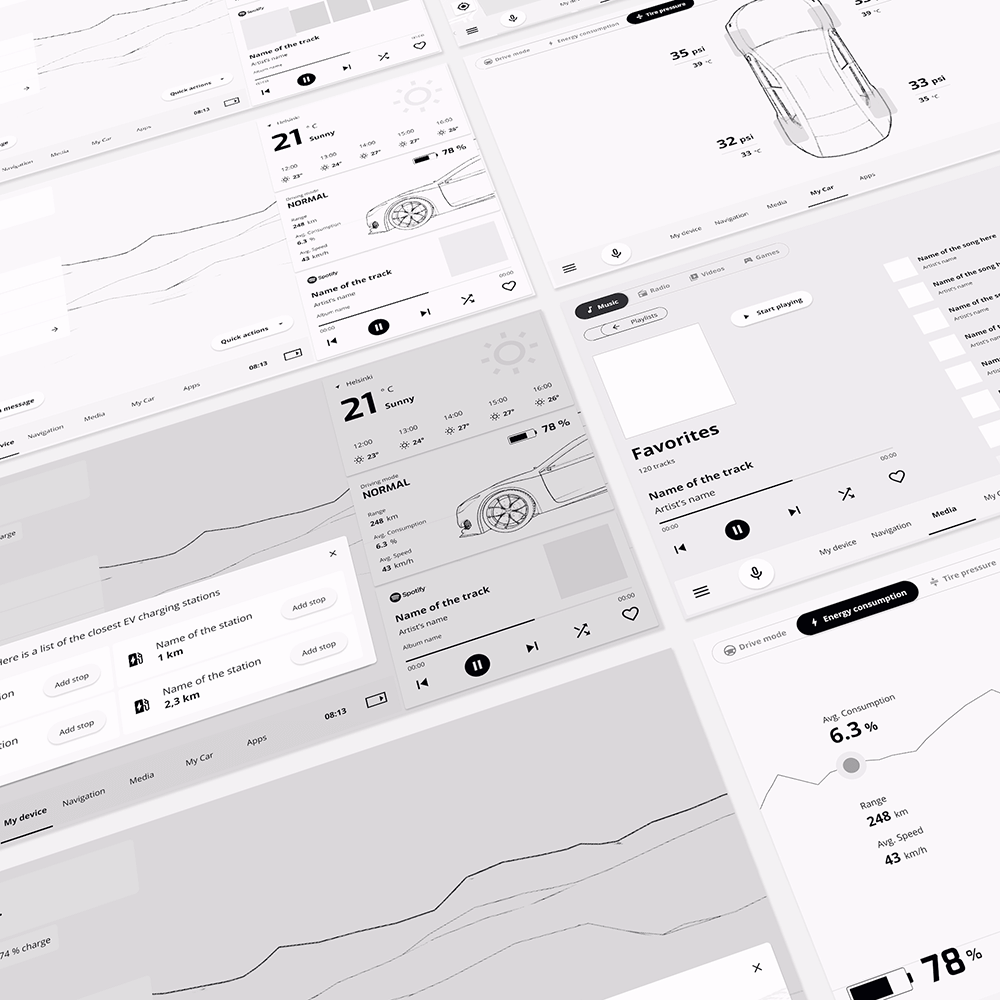
UI and interaction
In this step, the UI design starts to come together with the finalized assets and visuals. We created our assets and UI components in Figma, but our UI creation tool Qt Design Studio also supports importing designs from similar tools like Sketch, Adobe XD, and Photoshop. In addition to these Design Bridges, Qt supports asset importing for all major 2D and 3D formats.
From design to prototype
The handover from designer to developer is a critical step that has historically been a painful ordeal. We chose a simpler route by going beyond mere prototyping, including the use of Design Bridges, and component reusability.
- Importing designs
- Building interaction
- Creating components
- Adding data bindings

Using the Design Bridges
We want to make the teamwork of UI Designers, Technical Artists, and Developers as smooth as possible by eliminating the "design handover" step altogether. To achieve this, we have developed the Design Bridges. The Bridges allow you to export your UI designs and prototypes from tools like Figma, Sketch, Adobe XD, and Photoshop directly to Qt Design Studio.
The Bridge imports all assets, layouts, components, and even UI interaction, as the UI designer intended. As the design evolves, the UI Developer or Technical Artist can update any changes throughout the development cycle.
Developing the UI logic
We wanted to build a low-code environment where Technical Artists and UI Designers can build UI interaction and logic using visual tools. Everything you make in Qt Design Studio works immediately on the target environments, bridging the gap between the prototype and the final product. Why settle for prototyping when you can produce functional code right from the start?
We put ourselves in our customers' shoes throughout this project and vetted our tooling with critical eyes. The list of usability improvements and new features we've come up with in the past few months is quite impressive!
Creating reusable components
In every UI, there are some elements you want to reuse throughout the project. It could be a button, a slider, a music player, or a 3D scene. Qt allows you to turn these elements into reusable components that you can easily drag and drop in place and reuse throughout your project.
You can even reuse the components between different projects and share them with your co-workers and suppliers. This eventually allows you to create design systems that make UI development infinitely faster.
Bringing the UI to life through data bindings
UI applications are rarely self-contained, as they rely heavily on data coming from various sources like the sensors, HW, or the cloud. It's important for the Technical Artist or UI Designer to easily connect the UI components to real data sources.
We've simplified this workflow by decoupling the data from the UI, making it easy for Designers and Technical Artists to create data bindings to UI elements with visual tools, and for Developers to work on and even switch backends without affecting the frontend.
3D Graphics
3D graphics can be a great tool when visualizing complex ideas and creating immersive environments. After all, we experience the world in 3D. When including 3D elements in the UI, we've got you covered.
- Optimising for real-time
- Importing 3D assets
- Applying materials
- Adding a bit of flair
Optimising 3D assets for real-time rendering
The basis for a well-performing embedded project is created with well-made assets. Here are some principles we follow when optimizing assets for a project like this:
- Make sure the model geometry is clean.
- Remove any hidden meshes and unused data; they can add up quickly.
- Use PBR materials for high-impact parts and single-color materials where it makes sense.
- Reduce the number of textures and make sure they are appropriately sized based on visual impact.
Most of the rendering optimizations can be done in Qt Design Studio. The geometry is defined in the 3D asset creation pipeline.
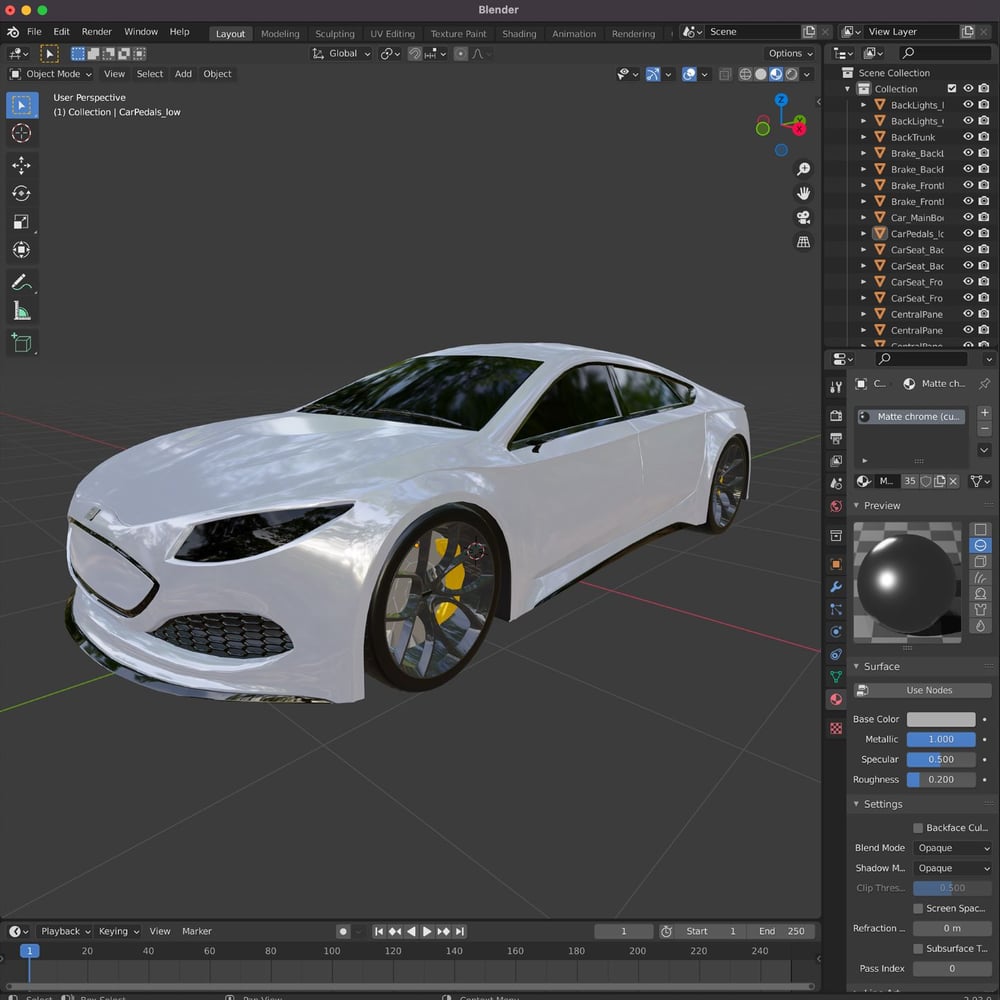
Importing 3D assets
Just like with any other popular engine, we created our 3D assets in an external tool like Blender or 3ds Max, and then imported the scene to our Qt Design Studio project. Qt supports all major 3D file formats like .blend, .dae, .fbx, .glb, .gltf, .obj, .uia, and .uip, so all of your assets should work out of the box.
Our team tends to lean towards using the glTF 2.0 format as it allows us to easily import the entire 3D scene description with lighting, materials, and textures in place.
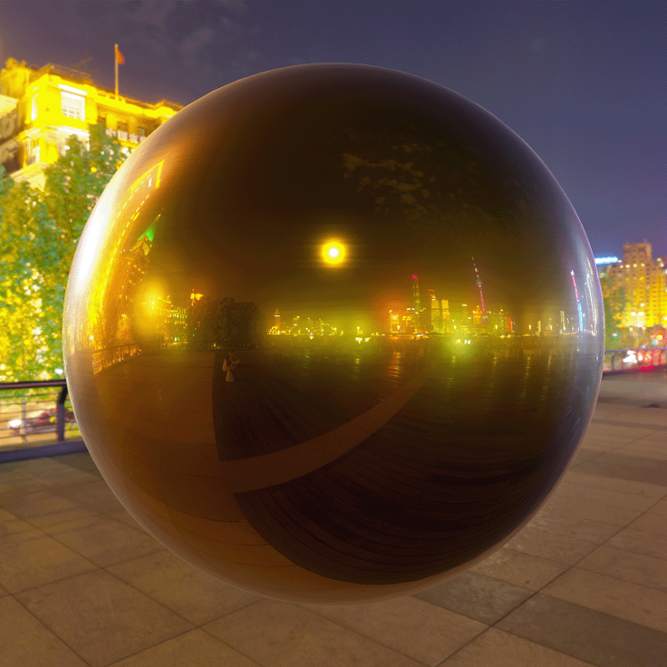
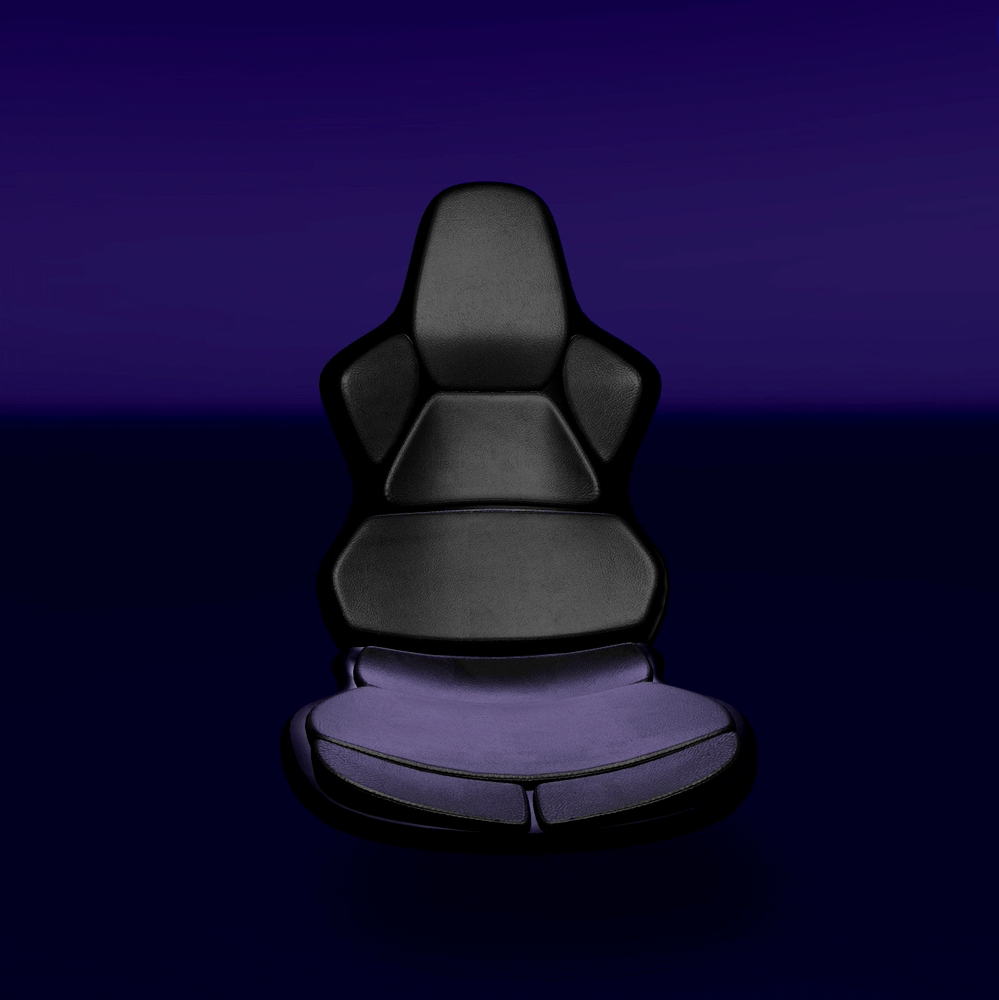
Materials and physically based rendering
Materials and lighting are the magic ingredients that bring a 3D scene together. Physically Based Rendering, or PBR, is a way of rendering objects with more realistic-looking materials by mimicking how light interacts with different surfaces and materials in the real world. Besides looking better, it also simplifies artists' workflow since materials are based on physical parameters and thus more intuitive to use and tweak.
Qt ships with ready-made materials enabling dragging and dropping everything to place with ease. The principled material makes it a breeze to tweak your PBR materials just the way you like them. And the custom material component gives you complete freedom to get down to the nitty-gritty to create your own materials.
It's all about the post-processing magic
As we all know, post-processing is where movies come to life. The same can be said for real-time rendered 3D UIs!
Qt comes with nearly 30 ready-made effects, including staples like Gaussian blur, Bloom, Motion blur, Vignette, Chromatic aberration, Desaturate and many more. We also provide several anti-aliasing algorithms like Multisample, Temporal, and Progressive AA.
And if you cannot find what you’re looking for in our effects library, you can create your own custom effects.
Motion design
Great motion design can elevate your UI from "nice" to "WOW!" in a blink of an eye. Never underestimate to power of animation. Cinematic camera movements and compelling transitions get you there.
- Cinematic camera movements
- Compelling transitions
- Situational awareness
- Effective animations
Cinematic camera movements
Traditional 2D UI transitions are a bit like turning a page of a book or switching a slide in PowerPoint. It gets the job done but is nothing remarkable. Don't get us wrong, most of the time, simple is great and preferred in UX, but there are times when we should venture out of our comfort zones.
3D gives us a unique opportunity to take transitions to the next level by fully utilizing the dimensions available. Moving the camera across the 3D space can create compelling, cinematic transitions that help the overall immersion. It directs the user's eyes where we want them to look and gives us a chance to show the scene from the angle that makes the most sense.
Compelling transitions
Flowing, comprehensible transitions between views are excellent ways to improve user orientation in the interface significantly. With fluid transitions in 3D space, we can direct the users' attention to where we need it and create distinct scenes that immediately make it clear where in the UI the user is and what they can control in that specific view.
2D UIs mostly use standard, well-established transitions like Show and hide, Transform, Shift, and Superimposing. 3D space, however, gives us the freedom to experiment with e.g., Camera movements, Item rotation, Scaling, Opacity changes, and Item visibility.
Situational awareness through adaptive UIs
As we move towards autonomous vehicles, it's increasingly important to be able to visualize what the car detects. Strategic camera movements can be a great tool in increasing situational awareness, as you can point the drivers' eyes to the part of the scene you want them to acknowledge.
This could be a pedestrian crossing the road, a car about to overtake you, or a motorcycle in a blind spot. Zooming in on an important detail can be a great way to ensure it gets the driver's attention while zooming out on the scene can give an excellent overview of the surroundings.
Effective animations
The main role of a UI animation is to draw users' attention to an important CTA or show them what to do next. Animations also allow designers to communicate with users without text, which is especially important in the context of vehicle UI as the driver doesn't have time to focus on reading.
We use animations in countless parts of the Outrun cockpit demo. Qt animation framework made this possible.
Visual effects
Visual effects take the UI to the next level: we love a bit of shader magic here, post-processing there, and particle effects where it makes sense.
- Particle effects
- Custom shaders
- Lights and shadows
- Visualizing audio
Particle effects
We wanted to visualize the HVAC airflow controls in a fun way using the Qt particle system. The end-user can alter the airflow direction by moving the particles around on the screen using the touch screen, and since it’s all real-time rendered the particles will change colour with the air temperature.
Our particle system gives you complete freedom to create cool custom effects without coding, or you can choose to use one ready-made effects like rain, snow, smoke, and fog. Just drag and drop it in the scene, it’s that easy!
Custom shaders
While we provide many ready-made effects, it’s still essential to give the technical artists tools to write their custom effects and work their shader magic.
In Qt 5, effects were provided in form of GLSL (OpenGL Shading Language), but in Qt 6 we’ve brought in support for additional graphics APIs such as Vulkan, Metal, and Direct3D 11. Our shader pipeline is based on compiling Vulkan-compatible GLSL code into SPIR-V, followed by gathering reflection information and translating into other shading languages, such as HLSL, the Metal Shading Language, and various GLSL versions.
We used custom shaders in the Outrun project to visualise things like audio waves for the voice assistant system in the IVI.

Lights and shadows
Lights and shadows are what bring a scene together, and are probably the biggest hurdle when trying to achieve realism. While full-on raytracing and global illumination might not be realistic on your standard embedded platform, there are still loads of ways to ensure your scene looks a million bucks.
On limited HW like those we see in cars, the best results are achieved through a combination of tips and tricks like the use of PBR materials, HDR maps on light probes, ambient occlusion, baked shadow maps, and various small tweaks here and there that together form an impression of realism.
Fake it till you make it is a good guiding principle when doing real-time rendering on limited GPU resources.
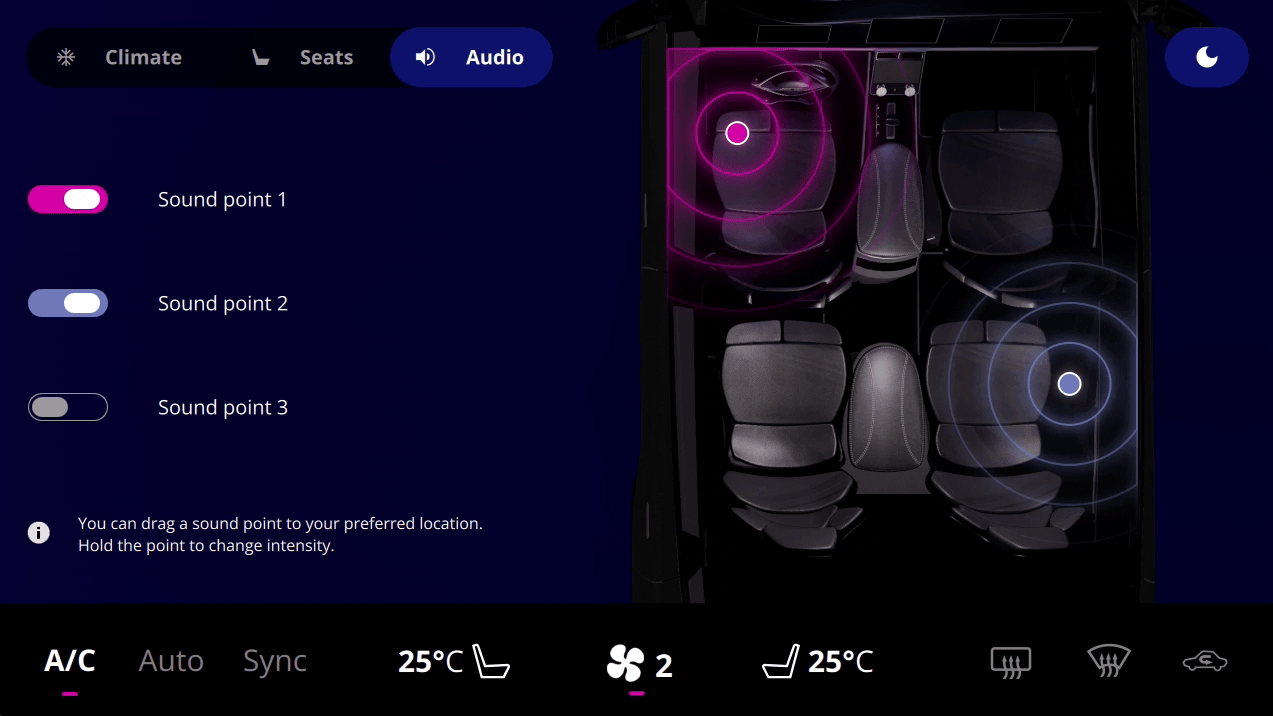
Visualizing audio
Audio is abstract and you cannot see it, but still we sometimes need to visualize it. Throughout this project, we explored different ways to visualize and control audio direction and intensity. As a result, we built this custom component that allows you to add and remove audio points, move them across the cockpit using touch, and change the intensity through long press and drag.
This component and many others from Outrun will be made available to all Qt users in the upcoming weeks. Stay tuned!
Connect with the vehicle
A beautiful UI with all the fancy effects does not matter much if the apps won't communicate and run seamlessly on target.
Everything has to work in real life.
- Go cross-platform
- Build the backend
- Analyze performance
- Assure the quality
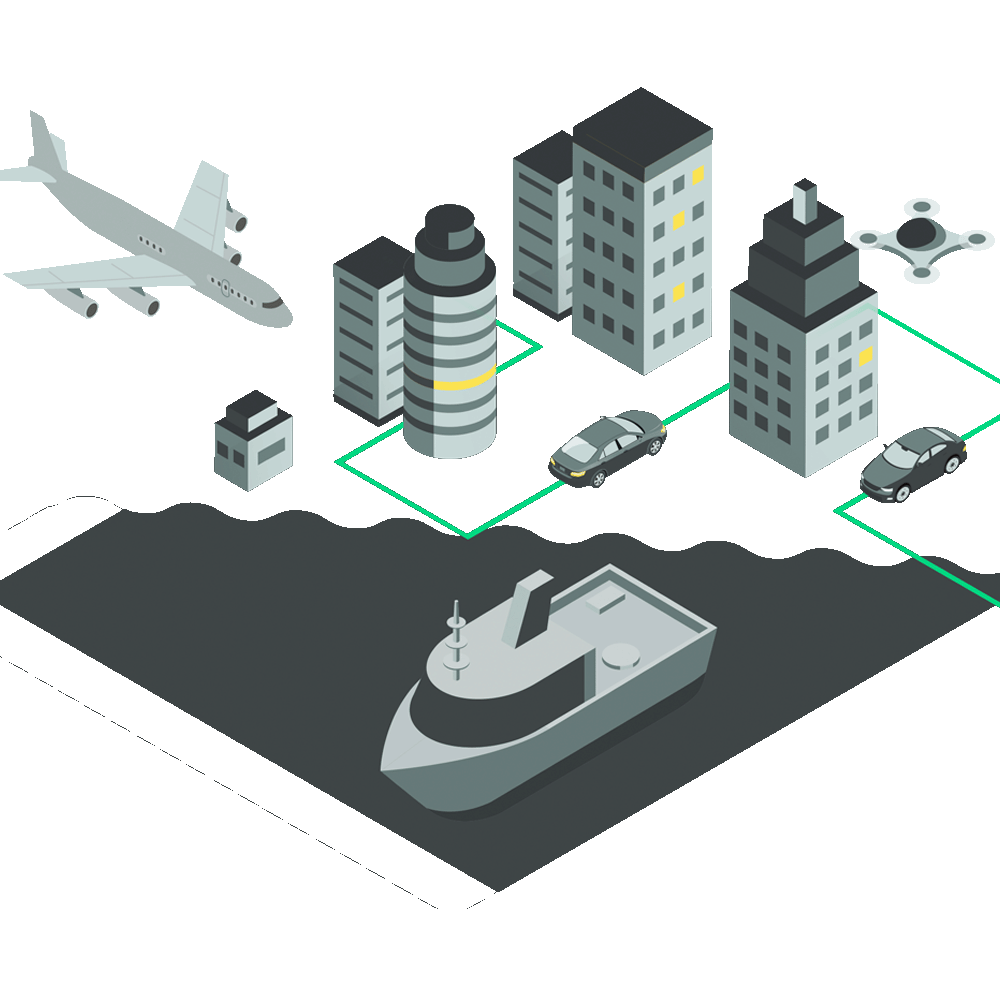
Cross-platform by nature
By nature, Qt is cross-platform and offers exceptional scalability. This allows you to develop your GUI once and deploy it to any operating system, device, or display.
We've run Outrun on Linux, Android, AAOS, Mac, & Windows, and in embedded, desktop, and mobile environments. You can also watch our example of a multi-OS cockpit.
Developing the application backend
Qt is so much more than just a GUI tool. It is a complete framework packed with 50+ modules that make life easier when developing application backends. Some of the more important ones for digital cockpits are:
• Qt Interface Framework allows you to create middleware APIs, backends, and services
• The Qt Application Manager helps you build highly complex systems with multi-process setups to increase flexibility and stability
• Qt Remote Objects, an inter-process communication module, allows you to easily enable connectivity within your setup.
See the complete list of official Qt modules for more information.
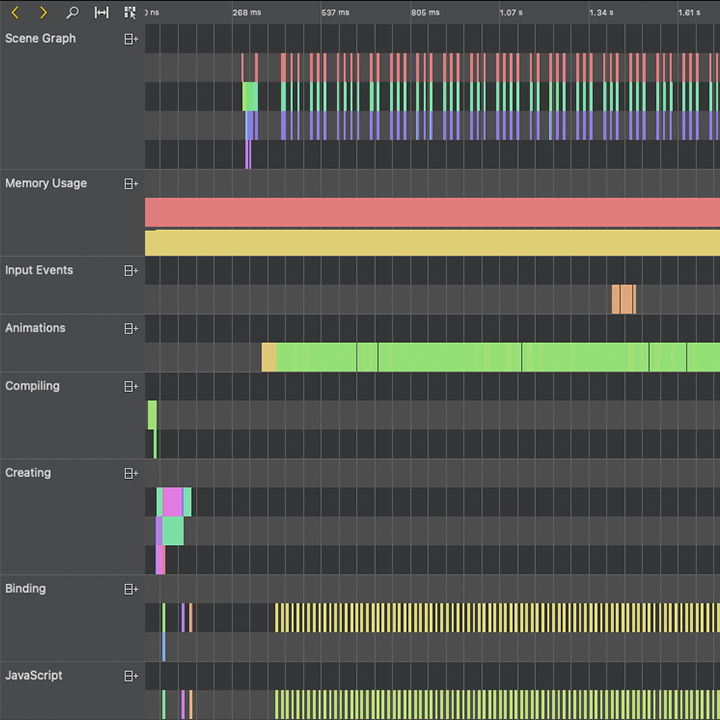
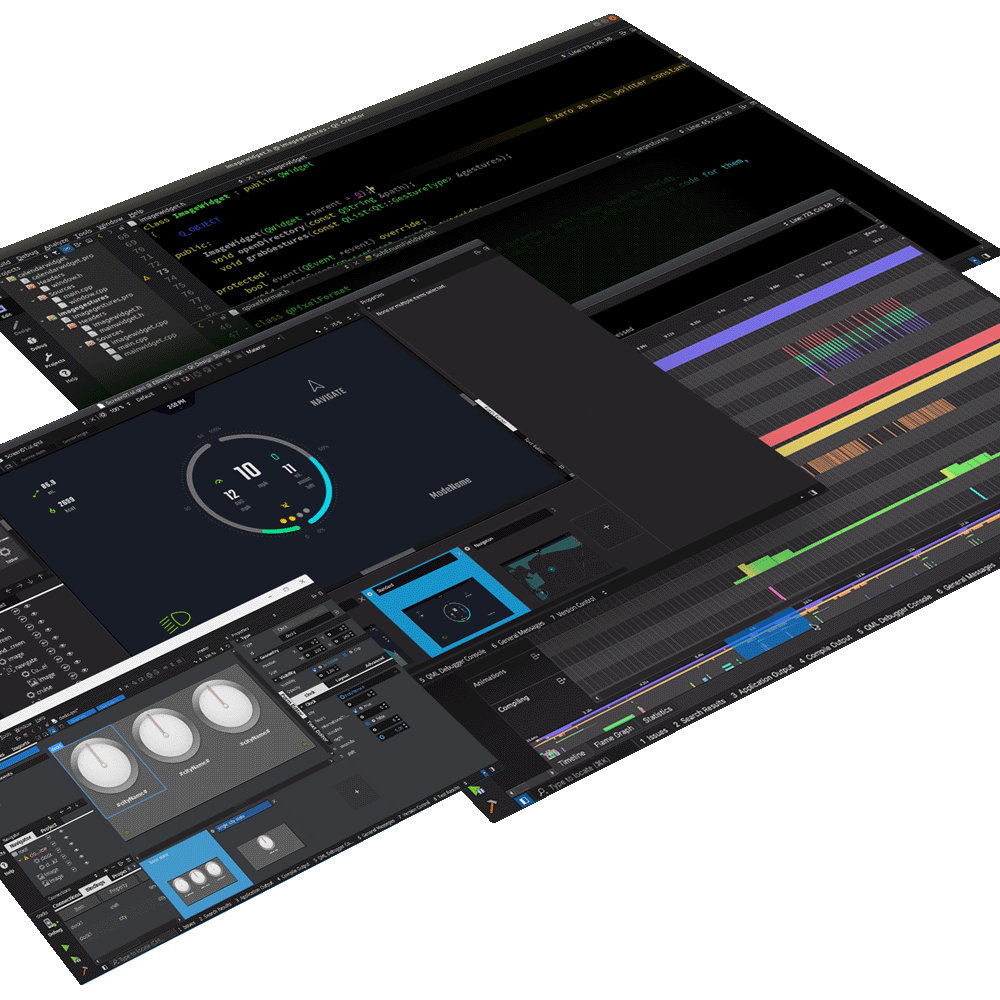
Performance analysis and benchmarking
Sometimes, things don't run smoothly when trying out a new hardware environment. Therefore, it's vital to have the appropriate tools to test and profile your applications. You can use the QML Profiler to find causes for typical performance problems in your applications, such as slowness and unresponsive, stuttering user interfaces.
Especially in 3D space, it's easy to blow up your scene with excessive draw calls, complex shaders, massive triangle counts, and large textures. Luckily, profiling tools can be your best friends in combating the bloat.
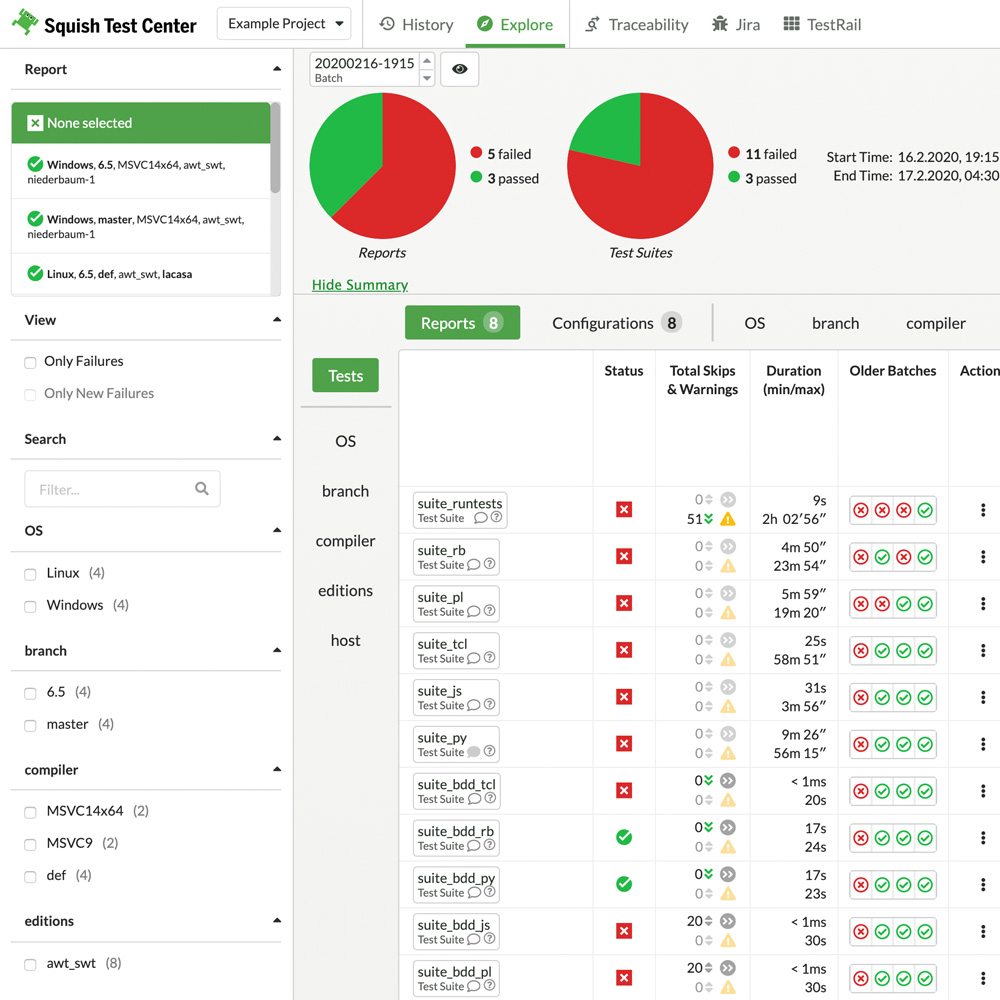
Assure the system quality
Quality Assurance is an essential puzzle piece when building complex systems like Outrun. Qt provides a complete Quality Assurance suite for GUI development to help you in your journey. You can easily conduct automated cross-device, cross-technology GUI testing coupled with code coverage analysis of your entire test framework.
Read more about our GUI tester and code coverage analysis tool.
Are you ready?
Follow our steps and turn your wildest ideas into reality. Start by downloading Qt or book a demo session with our experts.