May 13, 2026
Qt Design Studio 4.8.2 ships a major upgrade to the AI assistant, transforming it into a fully agentic AI and taking AI-assisted design to the next level. It now has access to your entire QML project and can autonomously read, write, and refactor your files to complete tasks end to end.
In Qt Design Studio 4.8.1, we introduced the beta version of the AI assistant UI design capabilities. It worked as a prompt-based tool that could generate QML user interfaces from natural-language descriptions or analyze images and produce matching UI components. It was a strong start, but it worked in isolation. The assistant was unaware of your project structure and could only see the currently open QML file. Each interaction was simple: one request produced one response.
Qt Design Studio 4.8.2 takes a fundamentally different approach. The assistant is now built on the Model Context Protocol (MCP), the open standard for connecting AI models to external tools, and ships as a full agentic AI system similar in spirit to Claude Code: you describe a goal in natural language, and the assistant reads your project, reasons about it, makes the necessary changes, and iterates until the task is done. Each action it takes, such as reading or editing a file, is shown in the assistant’s chat history so you can follow what it is doing. Because it works across the entire project rather than just the currently open file, the results are far more powerful and comprehensive (see image below).
 AI agent UI design in action: the agentic AI assistant generates a complete MedTech UI from a single natural-language prompt.
How AI Assisted Design Works in Qt Design Studio
The assistant works with your project through MCP resources and tools. Your QML project structure is exposed as a resource, giving the model visibility into the project's file structure. In addition, the QML MCP server and any other MCP servers you connect provide tools the assistant can use, such as reading, updating, or creating project content.
Under the hood, an Agentic Request Manager runs a tool-call loop. When you send a message, the manager sends it to the selected AI model along with a list of available tools. Instead of immediately returning a final answer, the model can respond with requests to use specific tools, like reading a file or making an edit. The Agentic Request Manager executes these actions via the MCP server and feeds the results back to the model. This cycle repeats until the model finishes the task. From your perspective, this entire multi-step process happens within a single conversation turn (see image below).

How AI-assisted design works in Qt Design Studio: the AI assistant, Agentic Request Manager, and QML MCP server collaborating to complete UI tasks autonomously
The AI Assistant supports leading models from Anthropic (Claude), Google (Gemini), and OpenAI. To manage these different services, we’ve implemented a series of adapters that handle the specific request and response formats of each provider.
The QML MCP Server
The QML MCP server is the component that gives the AI assistant its hands, enabling true AI agent UI design. Without it, the assistant can reason and respond, but cannot touch your project. It ships as a built-in part of Qt Design Studio, starts automatically when you open a project, and runs locally on your machine. There is nothing to install or configure. The assistant knows where your project lives and can begin working with it immediately.
Once the assistant starts, it receives the project structure as a resource, along with the tools from the QML MCP server. From that point, it has everything it needs to navigate and act on your project. The QML MCP server contains five tools:
📖 read_qml: Returns the full content of a QML file.✨ create_qml: Creates a new QML file.✏️ modify_qml: Overwrites an existing QML file with new content.🗑️ delete_qml: Deletes a QML file. Asks for your confirmation before removing it.📁 move_qml: Moves or renames a QML file within the project, creating destination directories as needed.
Security and Safety
The QML server runs locally on your machine and communicates via standard I/O rather than a network socket, so there is no exposed port and no remote attack surface. It is also strictly scoped to your project folder, so the assistant cannot read or modify any file outside the project root, regardless of what it is asked to do. It also cannot run scripts or execute anything beyond its defined tools, and every tool execution is visible in the conversation history.
That said, there are a few things worth keeping in mind.
Your Prompts Leave Your Machine
Everything you type, along with the contents of any files the assistant reads, is sent to the cloud provider you have configured. Avoid including sensitive business logic, personal data, or proprietary algorithms in prompts or in files you ask the assistant to work with.
Changes Are Written to Disk Immediately
The assistant writes changes directly to your files, though the last AI action can be reverted using the "Undo last AI changes" button. For larger agentic sessions that touch multiple files, working with version control gives you a safety net and lets you review changes the way you would with any other commit.
Be Cautious With Projects From Untrusted Sources
QML files can contain text crafted to manipulate an AI model's behavior, a technique known as prompt injection. A malicious comment or string value inside a file could instruct the assistant to behave in unintended ways when it reads that file. If you open a project downloaded from an unknown source and run the AI assistant against it, you are trusting that the project's contents are benign. When in doubt, review the QML files yourself before involving the assistant.
Connecting External MCP Servers
The assistant is not limited to the built-in QML server. The MCP settings panel lets you connect to any MCP-compatible server, local or remote. Each server contributes its tools to the model's toolset, alongside the built-in ones, so you can freely combine them in a single session.
Keep in mind that every enabled MCP server expands the assistant’s tool definitions. This increases the number of tokens sent with each request, which can raise usage costs and slightly increase response latency. A larger toolset may also make it harder for the model to consistently choose the most relevant tool in a given context and, in some cases, affect the quality of the generated result. For these reasons, it is recommended to enable only the MCP servers you actively need for your workflow.
The Figma Desktop MCP server is one external server that has been tested and works well with this release. Connecting it gives the assistant read access to your Figma design files directly from Qt Design Studio, enabling it to fetch Figma design data and generate the corresponding QML, mapped to your project's existing conventions. No manual translation, no copy-pasting.
To connect the Figma Desktop MCP server, make sure Figma's desktop app is running with MCP enabled in its settings. Add an HTTP server in the MCP settings panel and point it tohttp://127.0.0.1:3845/mcp. No bearer token is needed for the local desktop server.
Note that this is a different approach from the one we recently launched with Figma to Qt, the plugin to convert your Figma GUI designs to QML code.
Where the AI assistant reads your Figma files through MCP and generates the UI design and the related QML through a conversation that happens in Qt Design Studio, Figma to Qt converts the GUI design you created, previewed, and approved in Figma in a deterministic and reliable way: it maps Figma Auto Layout to Qt FlexboxLayout, Figma variables to QML tokens, and Figma controls to Qt Quick Controls.
Two different approaches, so you can choose the one that better fits your own workflow.
Choosing a Provider and Model
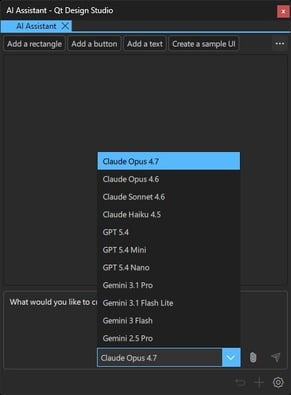
The assistant supports three providers: Claude (Anthropic), OpenAI, and GPT. All three work with the full agentic feature set. To get started, enable a provider in the AI Assistant settings, paste in your API key, and select a model. You can enable multiple providers simultaneously and switch between them in the model selector within the same conversation. Each provider ships with a curated list of default models, but you are not limited to them. If a provider releases a new model you want to try, you can add it by ID in the settings, and it will appear in the model’s selector.
Pricing varies significantly across providers and model tiers. In general, flagship models (Opus, GPT-5.4, Gemini Pro) offer the strongest reasoning but cost more per request, while smaller variants (Haiku, Mini, Nano, Flash) are substantially cheaper and fast enough for most everyday tasks. Notably, Google offers a generous free tier for Gemini Flash models that is ideal for prototyping, whereas comparable access to Claude or OpenAI models requires a paid subscription. Checking each provider's current pricing page before committing to a model for heavy use is strongly recommended.
Getting the Best Results from AI-Assisted Design
Give the Assistant a Goal, Not a Method
Instead of "read Button.qml and add a disabled property", try "the Button component needs a disabled visual state, figure out the right approach and implement it." The model reads the file, understands the existing pattern, and makes an informed decision. Prescribing exact steps prevents it from reasoning about the best approach.
Be Specific About Files and Components
"Fix the button" is ambiguous in a project with several button-like components. "Fix the disabled state in components/Button.qml" directs the model precisely and reduces unnecessary tool calls.
Refer to Project Files, Not Design Studio UI
The assistant understands your QML project files, not the Qt Design Studio interface itself. Instructions that reference UI elements such as “add it in the 2D view,” “place it in the Navigator,” or “edit it in the property panel” can confuse the model because those concepts do not exist in the AI context. Instead, prefer instructions that reference files, components, or QML nodes and properties.
The Road Ahead
The introduction of agentic AI marks an important milestone in AI-assisted design for Qt Design Studio. Qt Design Studio’s AI assistant is still evolving, but it already demonstrates how AI-assisted design can move beyond simple generation and become an active, autonomous participant in the UI development process.
Looking ahead, an important evolution of this ecosystem will likely come from AI Skills. In modern agentic AI frameworks, skills act as modular capability packages that give an AI assistant specialized expertise for specific tasks. A skill can bundle instructions, workflows, templates, scripts, and documentation so that an agent can perform a specific job when needed. These reusable capability modules allow agents to extend their abilities without changing the underlying model. In the context of Qt Design Studio, AI Skills could enable assistants to learn and reuse specialized workflows such as:
- Generating UI components that follow a company’s design system
- Converting design assets into QML components
- Performing accessibility or responsiveness checks across QML files
- Refactoring large projects following specific rules
- Automating repetitive UI implementation tasks
Because skills are modular and portable, they can be shared across projects, teams, and even different AI tools. The future of AI assisted design in Qt is modular, extensible, and built to grow. Qt Design Studio will continue to evolve alongside the rapidly advancing AI ecosystem, updated to support the latest technologies and the most capable models available.


