# Capturing Images
One of the key features of the Camera element is that is can be used to take pictures. We will use this in a simple stop-motion application. By building the application, you will learn how to show a viewfinder, switch between cameras, snap photos and keep track of the pictures taken.
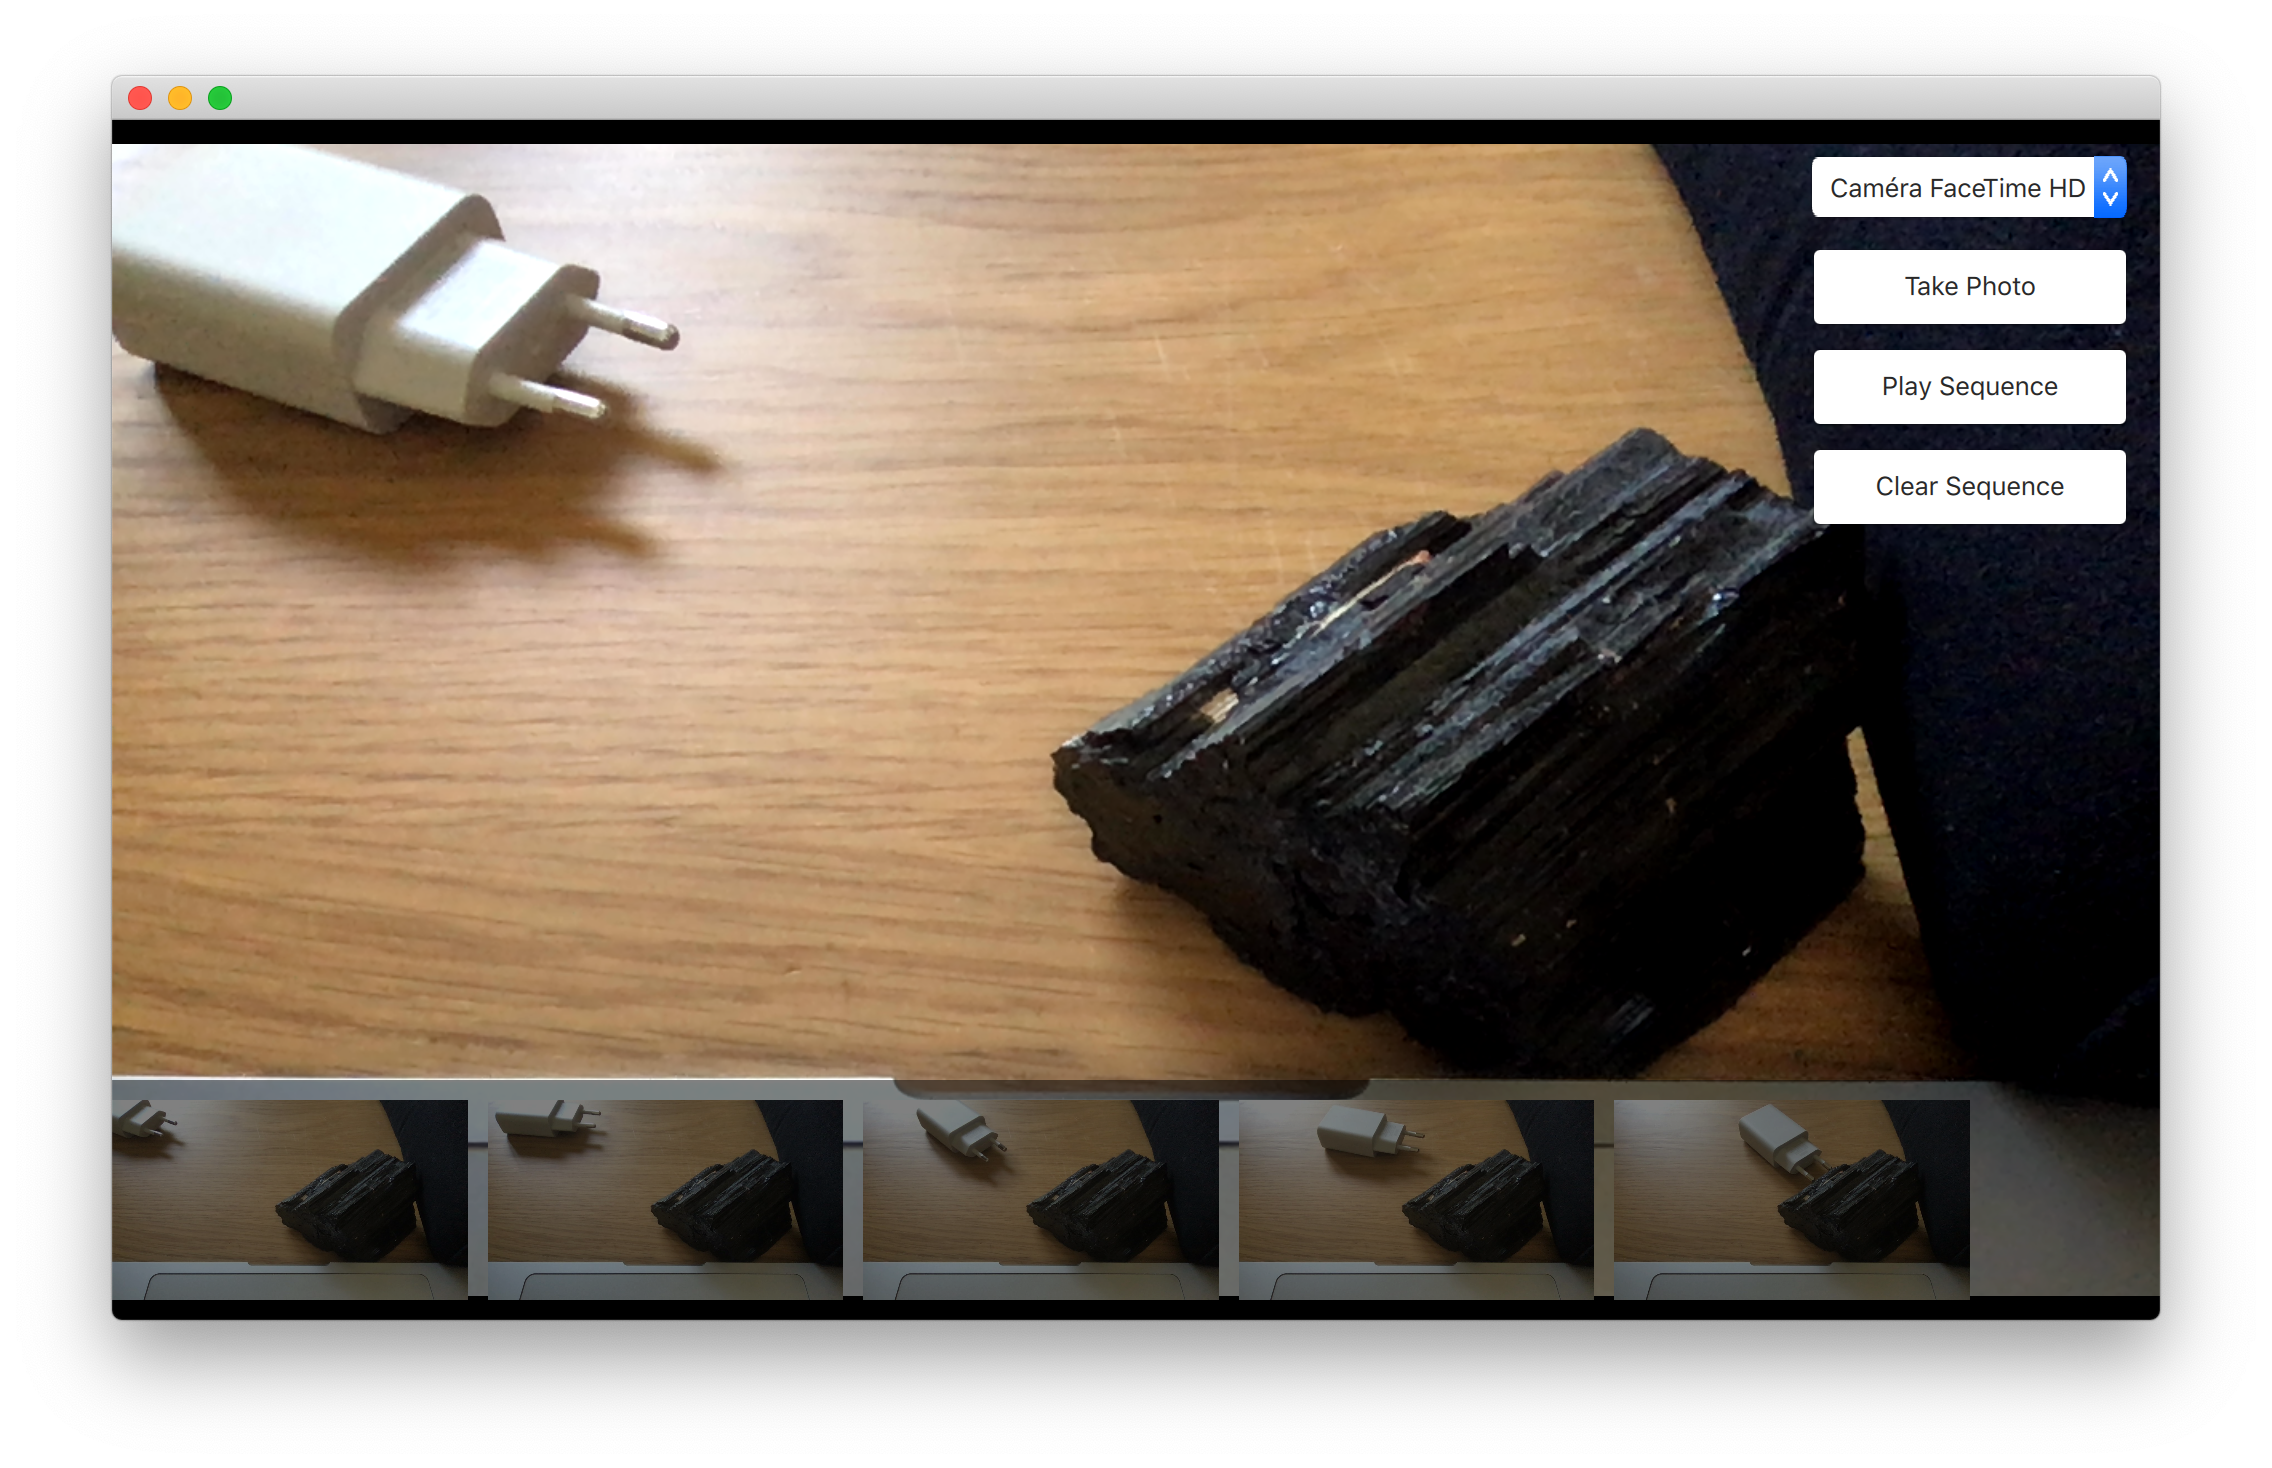
The user interface is shown below. It consists of three major parts. In the background, you will find the viewfinder, to the right, a column of buttons and at the bottom, a list of images taken. The idea is to take a series of photos, then click the Play Sequence button. This will play the images back, creating a simple stop-motion film.
# The viewfinder
The viewfinder part of the camera is made using a VideoOutput element as video output channel of a CaptureSession. The CaptureSession in turns uses a Camera component to configure the device. This will display a live video stream from the camera.
CaptureSession {
    id: captureSession
    videoOutput: output
    camera: Camera {}
    imageCapture: ImageCapture {
        onImageSaved: function (id, path) {
            imagePaths.append({"path": path})
            listView.positionViewAtEnd()
        }
    }
}

VideoOutput {
    id: output
    anchors.fill: parent
}
TIP
You can have more control on the camera behaviour by using dedicated Camera properties such as exposureMode, whiteBalanceMode or zoomFactor.
# The captured images list
The list of photos is a ListView oriented horizontally that shows images from a ListModel called imagePaths. In the background, a semi-transparent black Rectangle is used.
ListModel {
    id: imagePaths
}

ListView {
    id: listView

    anchors.left: parent.left
    anchors.right: parent.right
    anchors.bottom: parent.bottom
    anchors.bottomMargin: 10

    height: 100

    orientation: ListView.Horizontal
    spacing: 10

    model: imagePaths

    delegate: Image {
        required property string path
        height: 100
        source: path
        fillMode: Image.PreserveAspectFit
    }

    Rectangle {
        anchors.fill: parent
        anchors.topMargin: -10

        color: "black"
        opacity: 0.5
    }
}
For the shooting of images, the CaptureSession element contains a set of sub-elements for various tasks. To capture still pictures, the CaptureSession.imageCapture element is used. When you call the captureToFile method, a picture is taken and saved in the user's local pictures directory. This results in the CaptureSession.imageCapture emitting the imageSaved signal.
Button {
    id: shotButton

    width: parent.buttonWidth
    height: parent.buttonHeight

    text: qsTr("Take Photo")
    onClicked: {
        captureSession.imageCapture.captureToFile()
    }
}
In this case, we don’t need to show a preview image, but simply add the resulting image to the ListView at the bottom of the screen. Shown in the example below, the path to the saved image is provided as the path argument with the signal.
CaptureSession {
    id: captureSession
    videoOutput: output
    camera: Camera {}
    imageCapture: ImageCapture {
        onImageSaved: function (id, path) {
            imagePaths.append({"path": path})
            listView.positionViewAtEnd()
        }
    }
}
TIP
For showing a preview, connect to the imageCaptured signal and use the preview signal argument as source of an Image element. An id signal argument is sent along both the imageCaptured and imageSaved. This value is returned from the capture method. Using this, the capture of an image can be traced through the complete cycle. This way, the preview can be used first and then be replaced by the properly saved image. This, however, is nothing that we do in the example.
# Switching between cameras
If the user has multiple cameras, it can be handy to provide a way of switching between those. It's possible to achieve this by using the MediaDevices element in conjunction with a ListView. In our case, we'll use a ComboBox component:
MediaDevices {
    id: mediaDevices
}

ComboBox {
    id: cameraComboBox

    width: parent.buttonWidth
    height: parent.buttonHeight

    model: mediaDevices.videoInputs
    textRole: "description"

    displayText: captureSession.camera.cameraDevice.description

    onActivated: function (index) {
        captureSession.camera.cameraDevice = cameraComboBox.currentValue
    }
}
The model property of the ComboBox is set to the videoInputs property of our MediaDevices. This last property contains the list of usable video inputs. We then set the displayText of the control to the description of the camera device (captureSession.camera.cameraDevice.description).
Finally, when the user switches the video input, the cameraDevice is updated to reflect that change: captureSession.camera.cameraDevice = cameraComboBox.currentValue.
# The playback
The last part of the application is the actual playback. This is driven using a Timer element and some JavaScript. The _imageIndex variable is used to keep track of the currently shown image. When the last image has been shown, the playback is stopped. In the example, the root.state is used to hide parts of the user interface when playing the sequence.
property int _imageIndex: -1

function startPlayback() {
    root.state = "playing"
    root.setImageIndex(0)
    playTimer.start()
}

function setImageIndex(i) {
    root._imageIndex = i

    if (root._imageIndex >= 0 && root._imageIndex < imagePaths.count) {
        image.source = imagePaths.get(root._imageIndex).path
    } else {
        image.source = ""
    }
}

Timer {
    id: playTimer

    interval: 200
    repeat: false

    onTriggered: {
        if (root._imageIndex + 1 < imagePaths.count) {
            root.setImageIndex(root._imageIndex + 1)
            playTimer.start()
        } else {
            root.setImageIndex(-1)
            root.state = ""
        }
    }
}← Video Streams Summary →